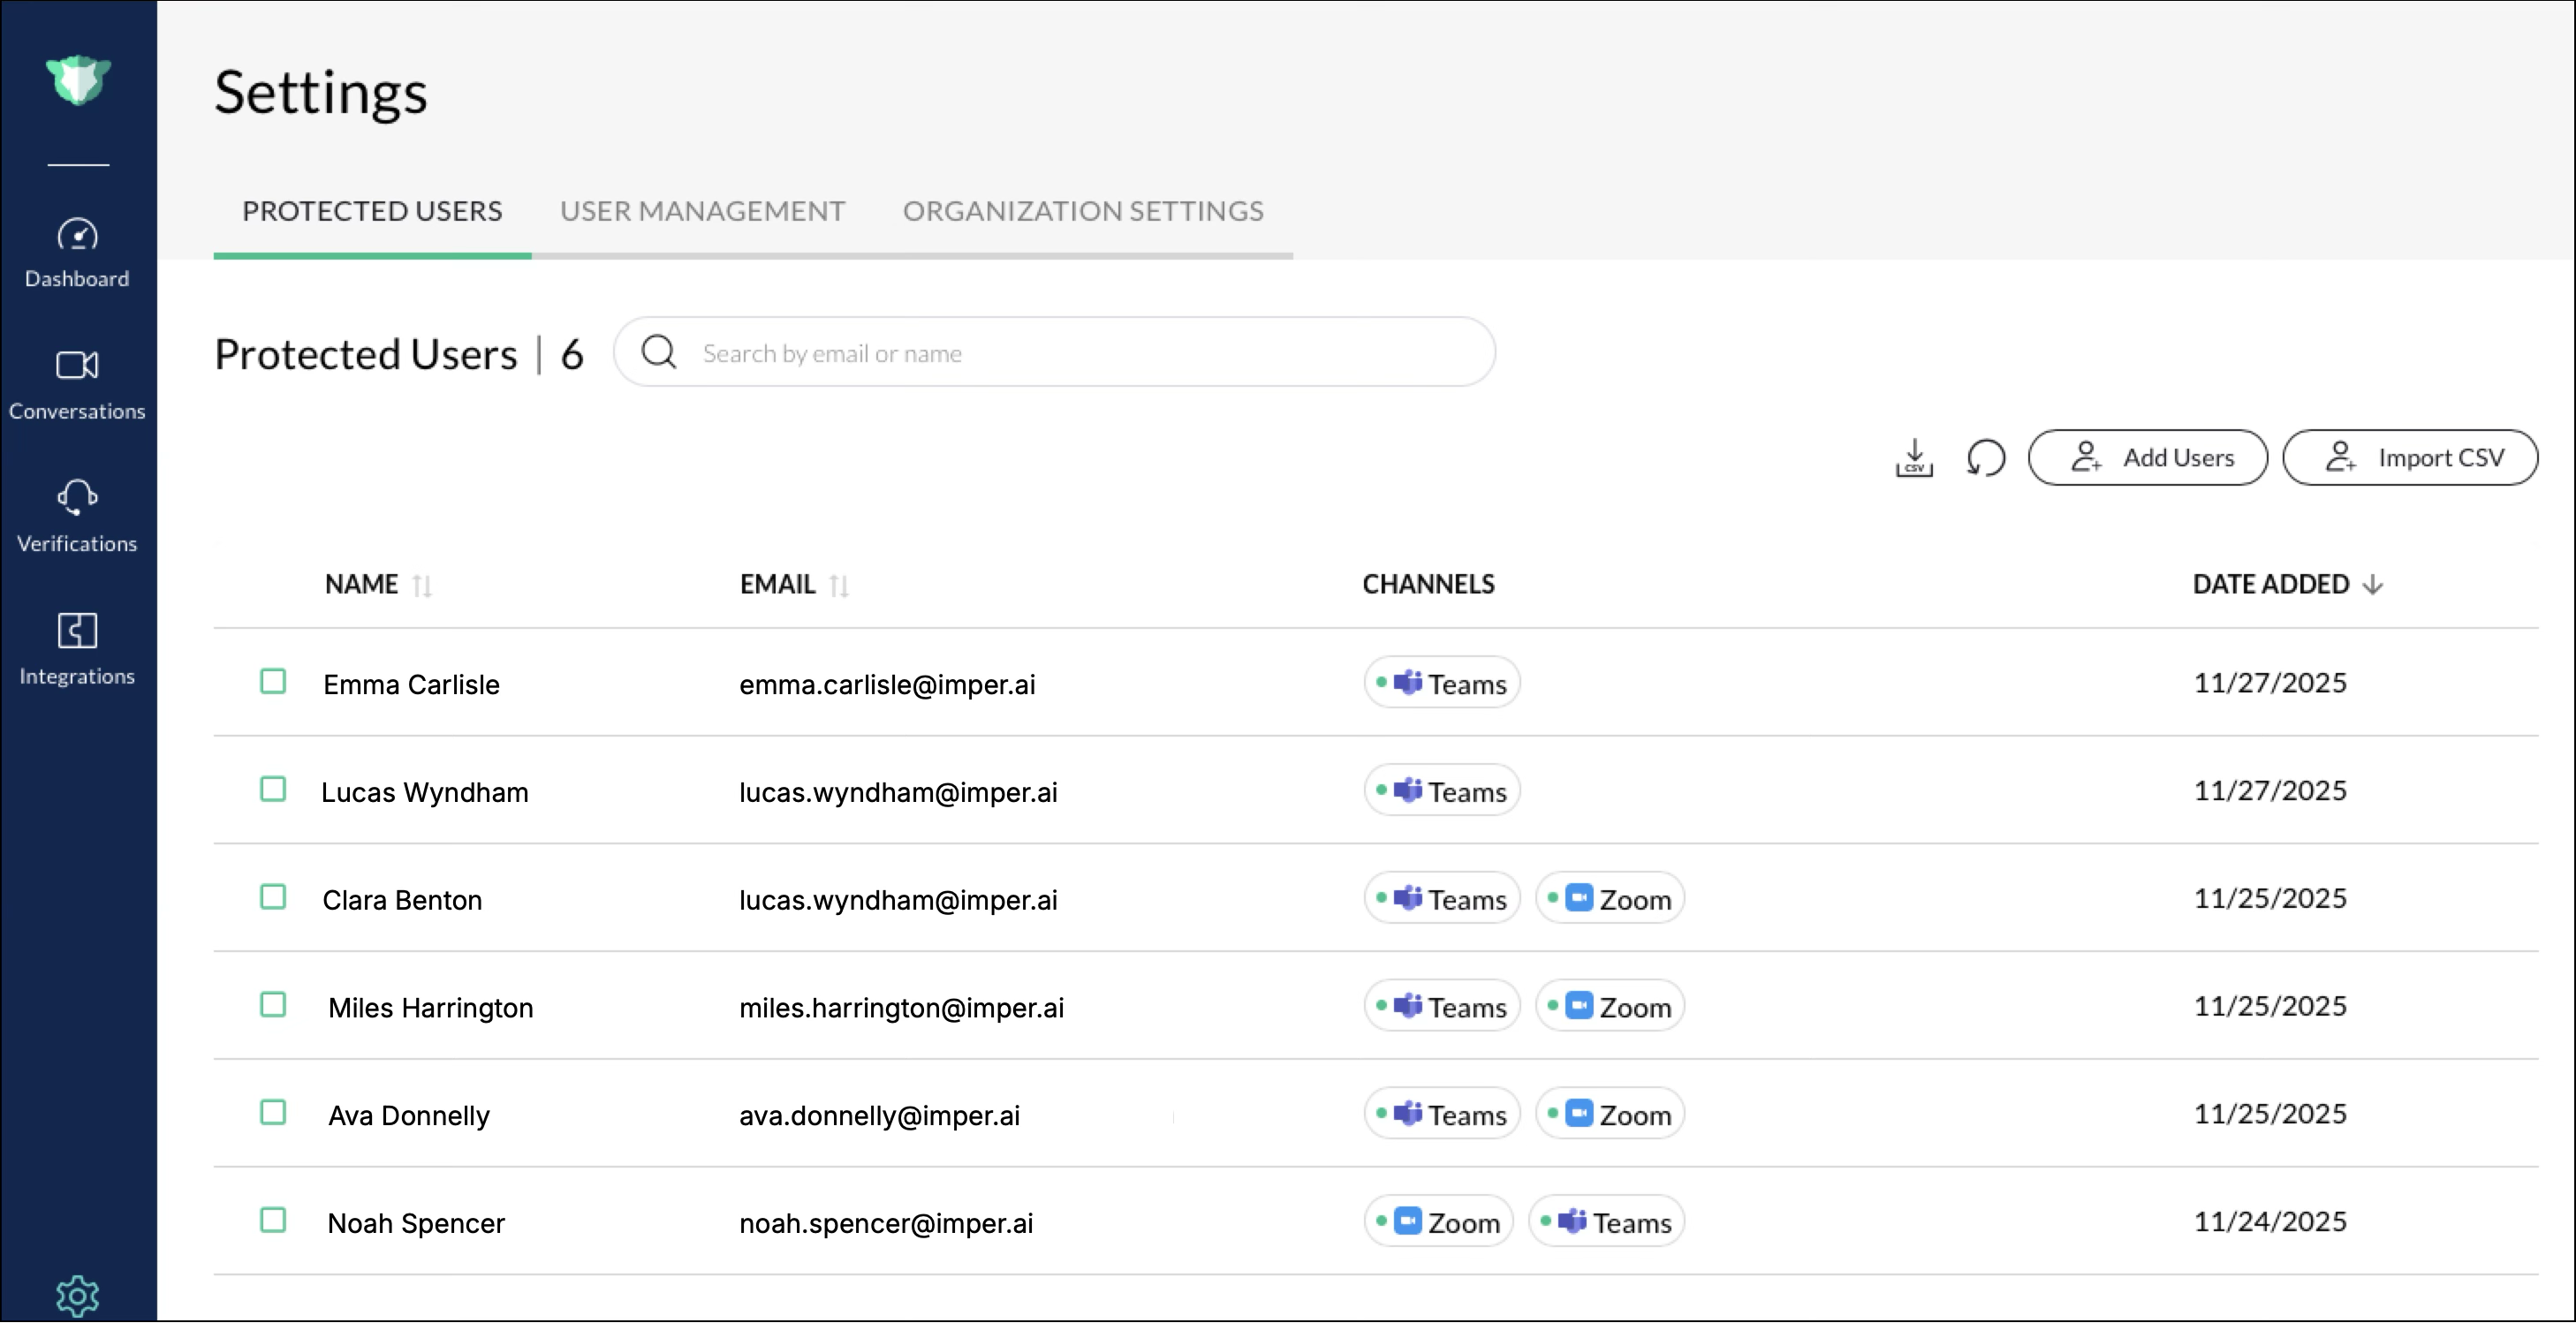
The Protected Users tab lists individuals within your organization whose communication channels are monitored and protected by imper.ai.
Only Admin users can add or remove Protected Users.
To access this tab, log into the imper.ai console and go to Settings > Protected Users.
Adding Protected Users
To start monitoring a user’s communication channels:
Click Add Users.
In the Add users to monitor dialog, enter one or more corporate email addresses separated by commas.
You can only add users who belong to your organization’s email domain.
When a valid email address is added, the Name and available Channels (for example, Meet, Zoom) populate automatically.
Click Add.
The new user appears in the Protected Users list along with their connected channels and the Date Added.
Importing Protected Users via CSV
You can add multiple protected users by clicking Import CSV.
Note
Duplicate records will not be imported into imper.ai
Your CSV file should ideally include the following columns:
Email (Required)
The user’s organization email address. This is the primary identifier for importing.
Only users that belong to your organization’s verified domains will be accepted.
If a CSV contains emails outside your approved domains, those entries will be rejected and shown in the import summary.
Name (Optional)
The user’s full name. If not provided, impera.ai attempts to resolve it automatically.
Optional. Specifies the communication channels to monitor (e.g., Meet, Zoom).
Channels (Optional)
If Channels is empty, impera.ai automatically attempts to assign all available communication channels that are currently connected under Settings > Integrations. This includes platforms such as Google Meet, Zoom, Slack, or Microsoft Teams (as applicable).
This ensures that every imported user receives full protection by default.
Exporting Protected Users via CSV
You can export the current list of protected users for review or audit purposes.
To export:
Click Export CSV at the top right of the Protected Users tab.
A CSV file downloads automatically, containing the following details for each protected user:
Name
Email
Channels
Date Added
This export provides a convenient snapshot of all users currently monitored by imper.ai, allowing administrators to track protection coverage or maintain compliance records.
Removing Protected Users
You may remove a user from the protection list using the Trash icon in the row actions.
Removing a protected user:
Stops monitoring their communication channels
Does not affect console access (User Management handles that)
Viewing Risk & Identity Indicators
Each Protected User row provides:
Name
Email
Status (Active/Inactive)
Coverage status (e.g., Connected, Pending)
Identity or risk anomaly indicators (if applicable)
If anomalies exist, icons or alerts appear next to the user in the UI.
Protected User Tips
Use the checkboxes to select one or more users for bulk actions.
To delete one or more users, click the trash icon, and confirm by selecting Proceed.
Click the refresh icon to reload the most recent user data.
Notes
Deleting a Protected User stops all monitoring activity for that individual.
The Date Added column records when each user was first protected.
The same user can appear under multiple channels if more than one communication platform is protected.
Searching, Sorting, and Filtering
Use the search bar to quickly find users by email or name.
Click any column header (Name, Email, Channels, or Date Added) to sort users alphabetically or chronologically.
Use the pagination controls at the bottom of the table to navigate through protected user lists.
Protected Users vs user Management
Protected Users | User Management |
|---|---|
Controls whose communication channels are protected | Controls who can log into the console |
Coverage-driven | Access-driven |
Changes protection | Changes permissions |