Overview
This integration connects Workday Recruiting with imper.ai to secure interviews throughout the hiring process. It enables protection and verification for interviews that are managed and scheduled directly within Workday, helping prevent impersonation and candidate fraud.
Note
The setup requires Workday admin access to complete the configuration steps.
To connect and manage the Workday integration in imper.ai, users must have admin role.
Workday Integration Setup Overview
The setup process consists of 6 steps:
Steps 1–5 are completed in Workday
Step 6 is completed in the imper.ai admin interface
By the end of the setup, you will have the following components:
Integration System User (ISU)
Security Group with required permissions
API Client credentials (Client ID & Secret)
Token Endpoint URL and Refresh Token
WSDL URL
Connecting Workday
Log in to your Workday tenant as an administrator and follow these steps to setup Workday:
Step 1: Create an Integration System User (ISU)
In the search bar, type"Create Integration System User" and select the task

Search for "Create Integration System User" task
In the “Create Integration System User” form, enter the following details:
User Name: imperai_ISU (of any name you of yout choice)
Password: Use a strong password (avoid special characters)
Require New Password at Next Sign In: Uncheck
Do Not Allow UI Sessions: mark as Checked
Click OK
.png)
Create Integration System User Form
.png)
ISU Summary
NOTE: Save the Username and Password — you'll need them at later steps.
Search for “Maintain Password Rules” and open the task.
Add your ISU to the “System Users Exempt from Password Expiration” field to ensure the integration remains active and is not disrupted by password expiration.
Step 2: Create a Security Group
In the search bar, type "Create Security Group" and select the task
From the Type of Tenanted Security Group dropdown, select: Integration System Security Group (Unconstrained)
Name it: imperai_SG (of any name you of yout choice)
Click OK
On the next screen (Edit Integration System Security Group), add your ISU (imperai_ISU) to the group
Click OK
.png)
Create Security Group
(2).png)
Step 3: Grant Permissions to the Security Group
You'll use the "Maintain Permissions for Security Group" task to configure all domain permissions in a single screen.
3a. Open the Permissions Screen
In the Workday search bar, type "Maintain Permissions for Security Group" and select the task.
In the dialog that appears:
Operation: Select "Maintain"
Source Security Group: Search for and select imperai_SG (the group you created in Step 2)
Click OK
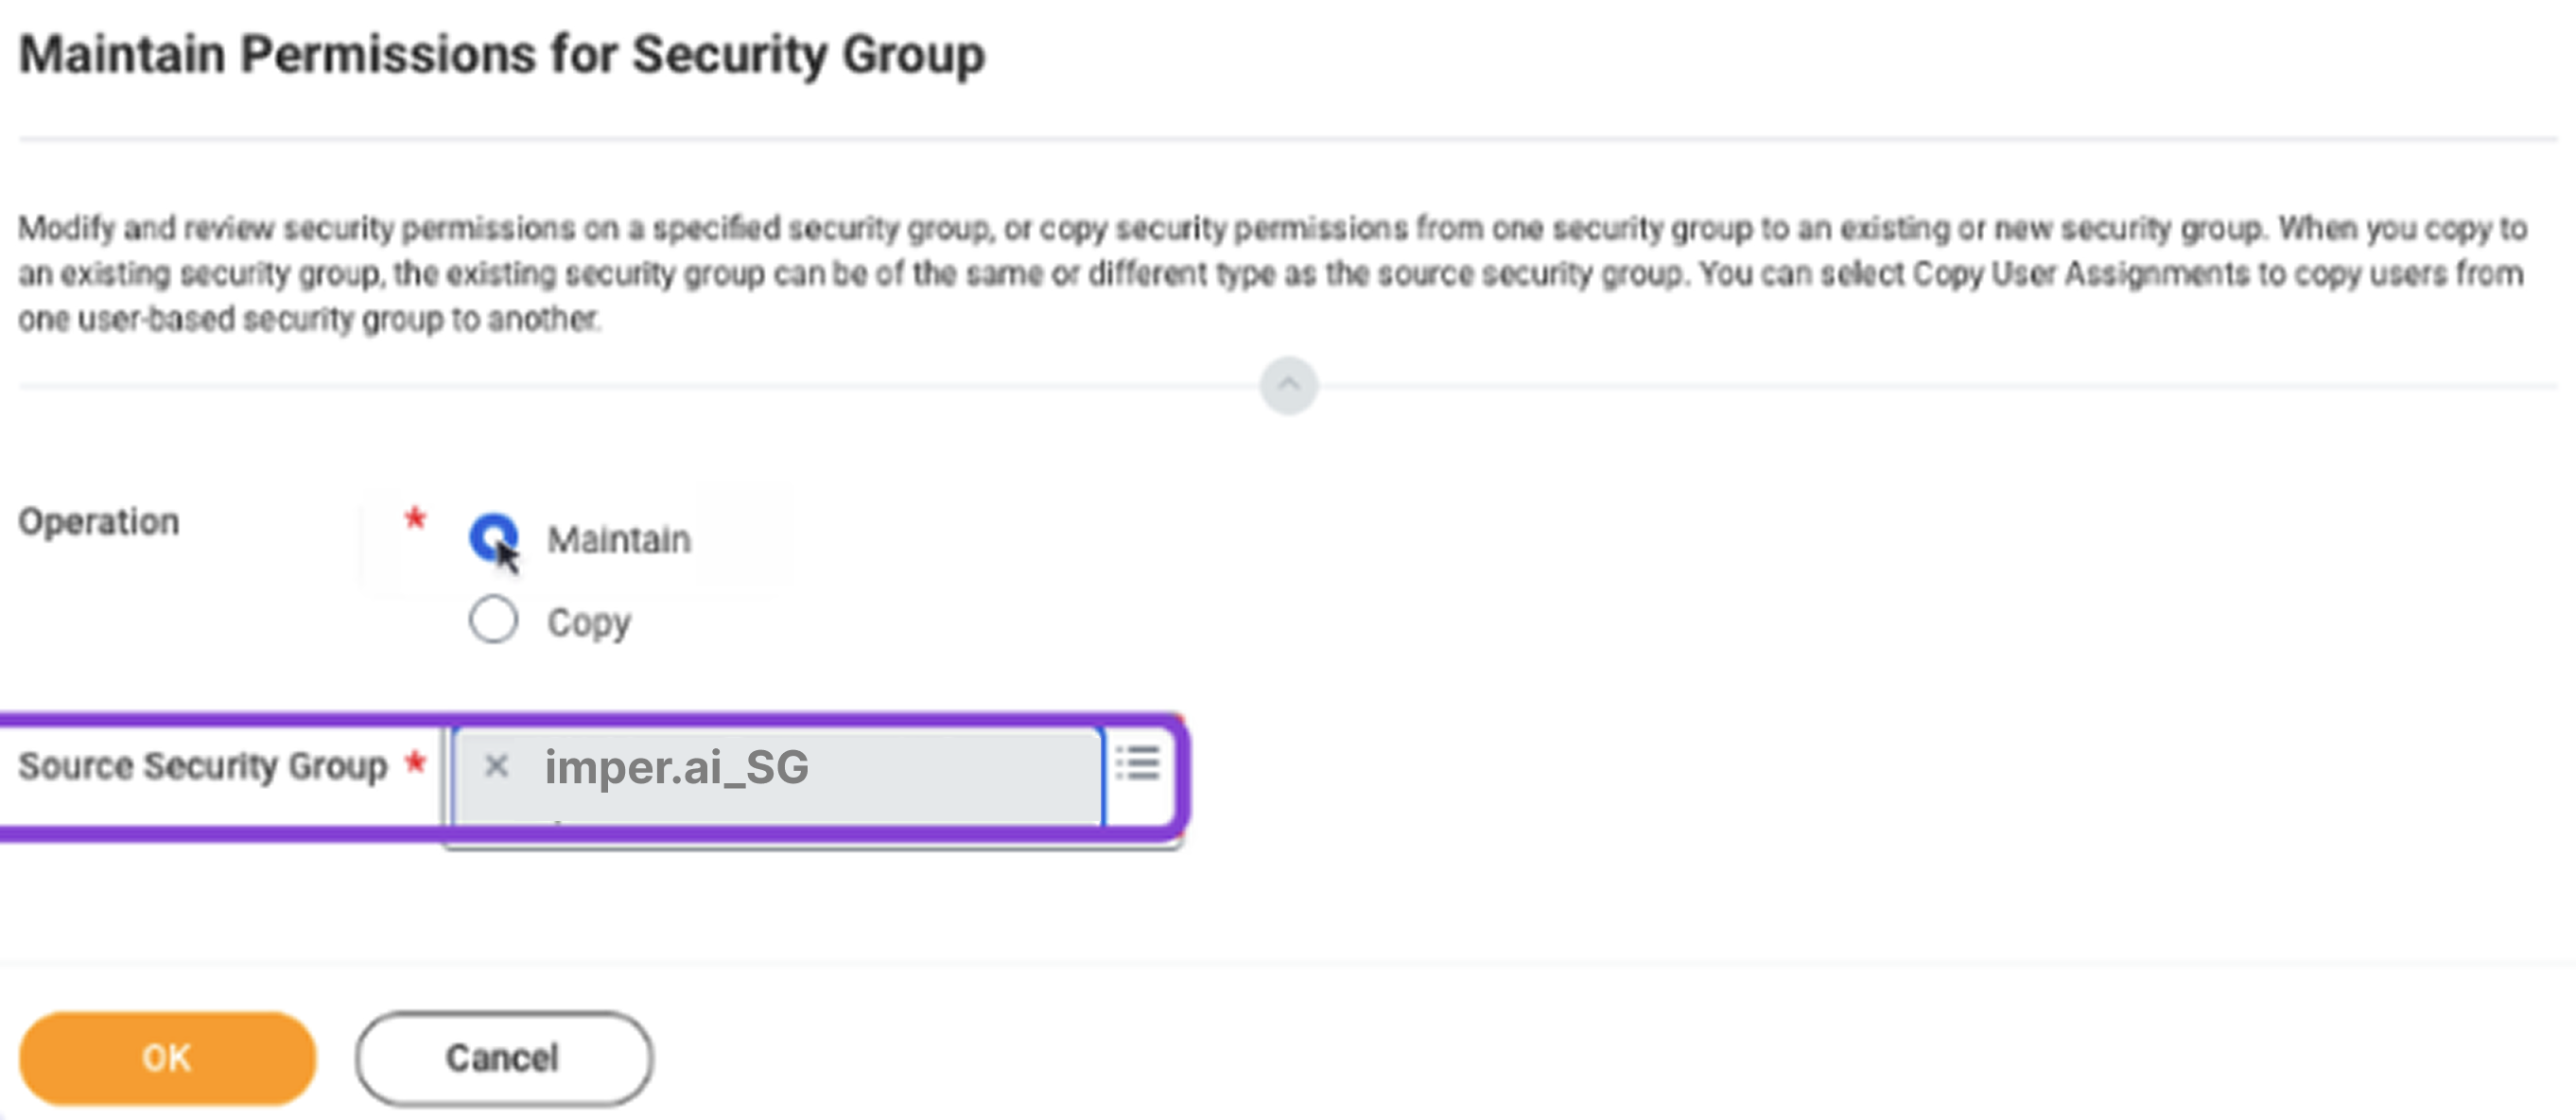
Maintain Permissions for Security Group
3b. Add Domain Permissions
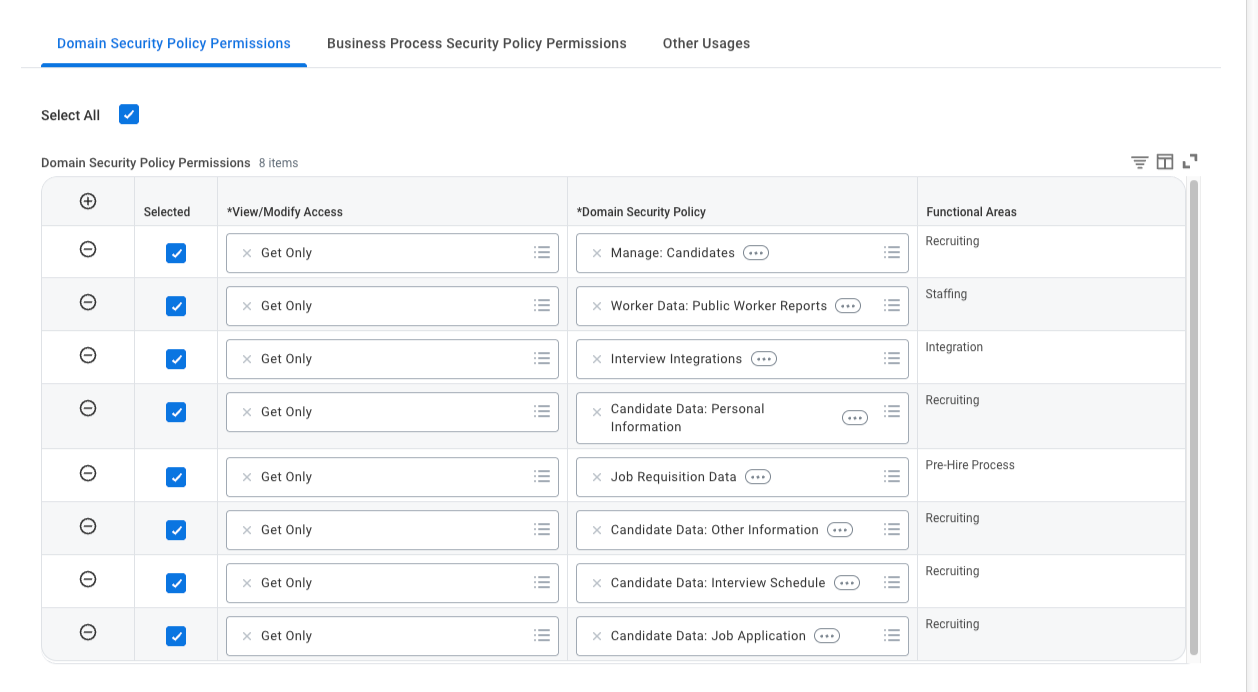
You will now see a screen with the Domain Security Policy Permissions section. This is where you add all the permissions imper.ai needs.
Scroll down to the Integration Permissions section
For each domain in the table below, click the + (add row) button
Search for and select the domain name
Check the Get box (and Put box where indicated)
Follow the table below to set permissions. Once all 8 domains are added with the correct checkboxes, click OK to save
Domain Security Policy | Get | Put |
|---|---|---|
Candidate Data: Job Application | ✅ | - |
Candidate Data: Personal Information | ✅ | - |
Candidate Data: Interview Schedule | ✅ | - |
Candidate Data: Other Information | ✅ | - |
Job Requisition Data | ✅ | - |
Manage: Candidates | ✅ | - |
Worker Data: Public Worker Reports | ✅ | - |
Interview Integrations | ✅ | - |
Step 4: Activate Security Policy Changes
This is critical — your permissions won't take effect until you activate them.
Search for "Activate Pending Security Policy Changes" and select the task.
Add a comment describing your changes (e.g., "Granted imper.ai integration permissions")
Check the Confirm checkbox
Click OK
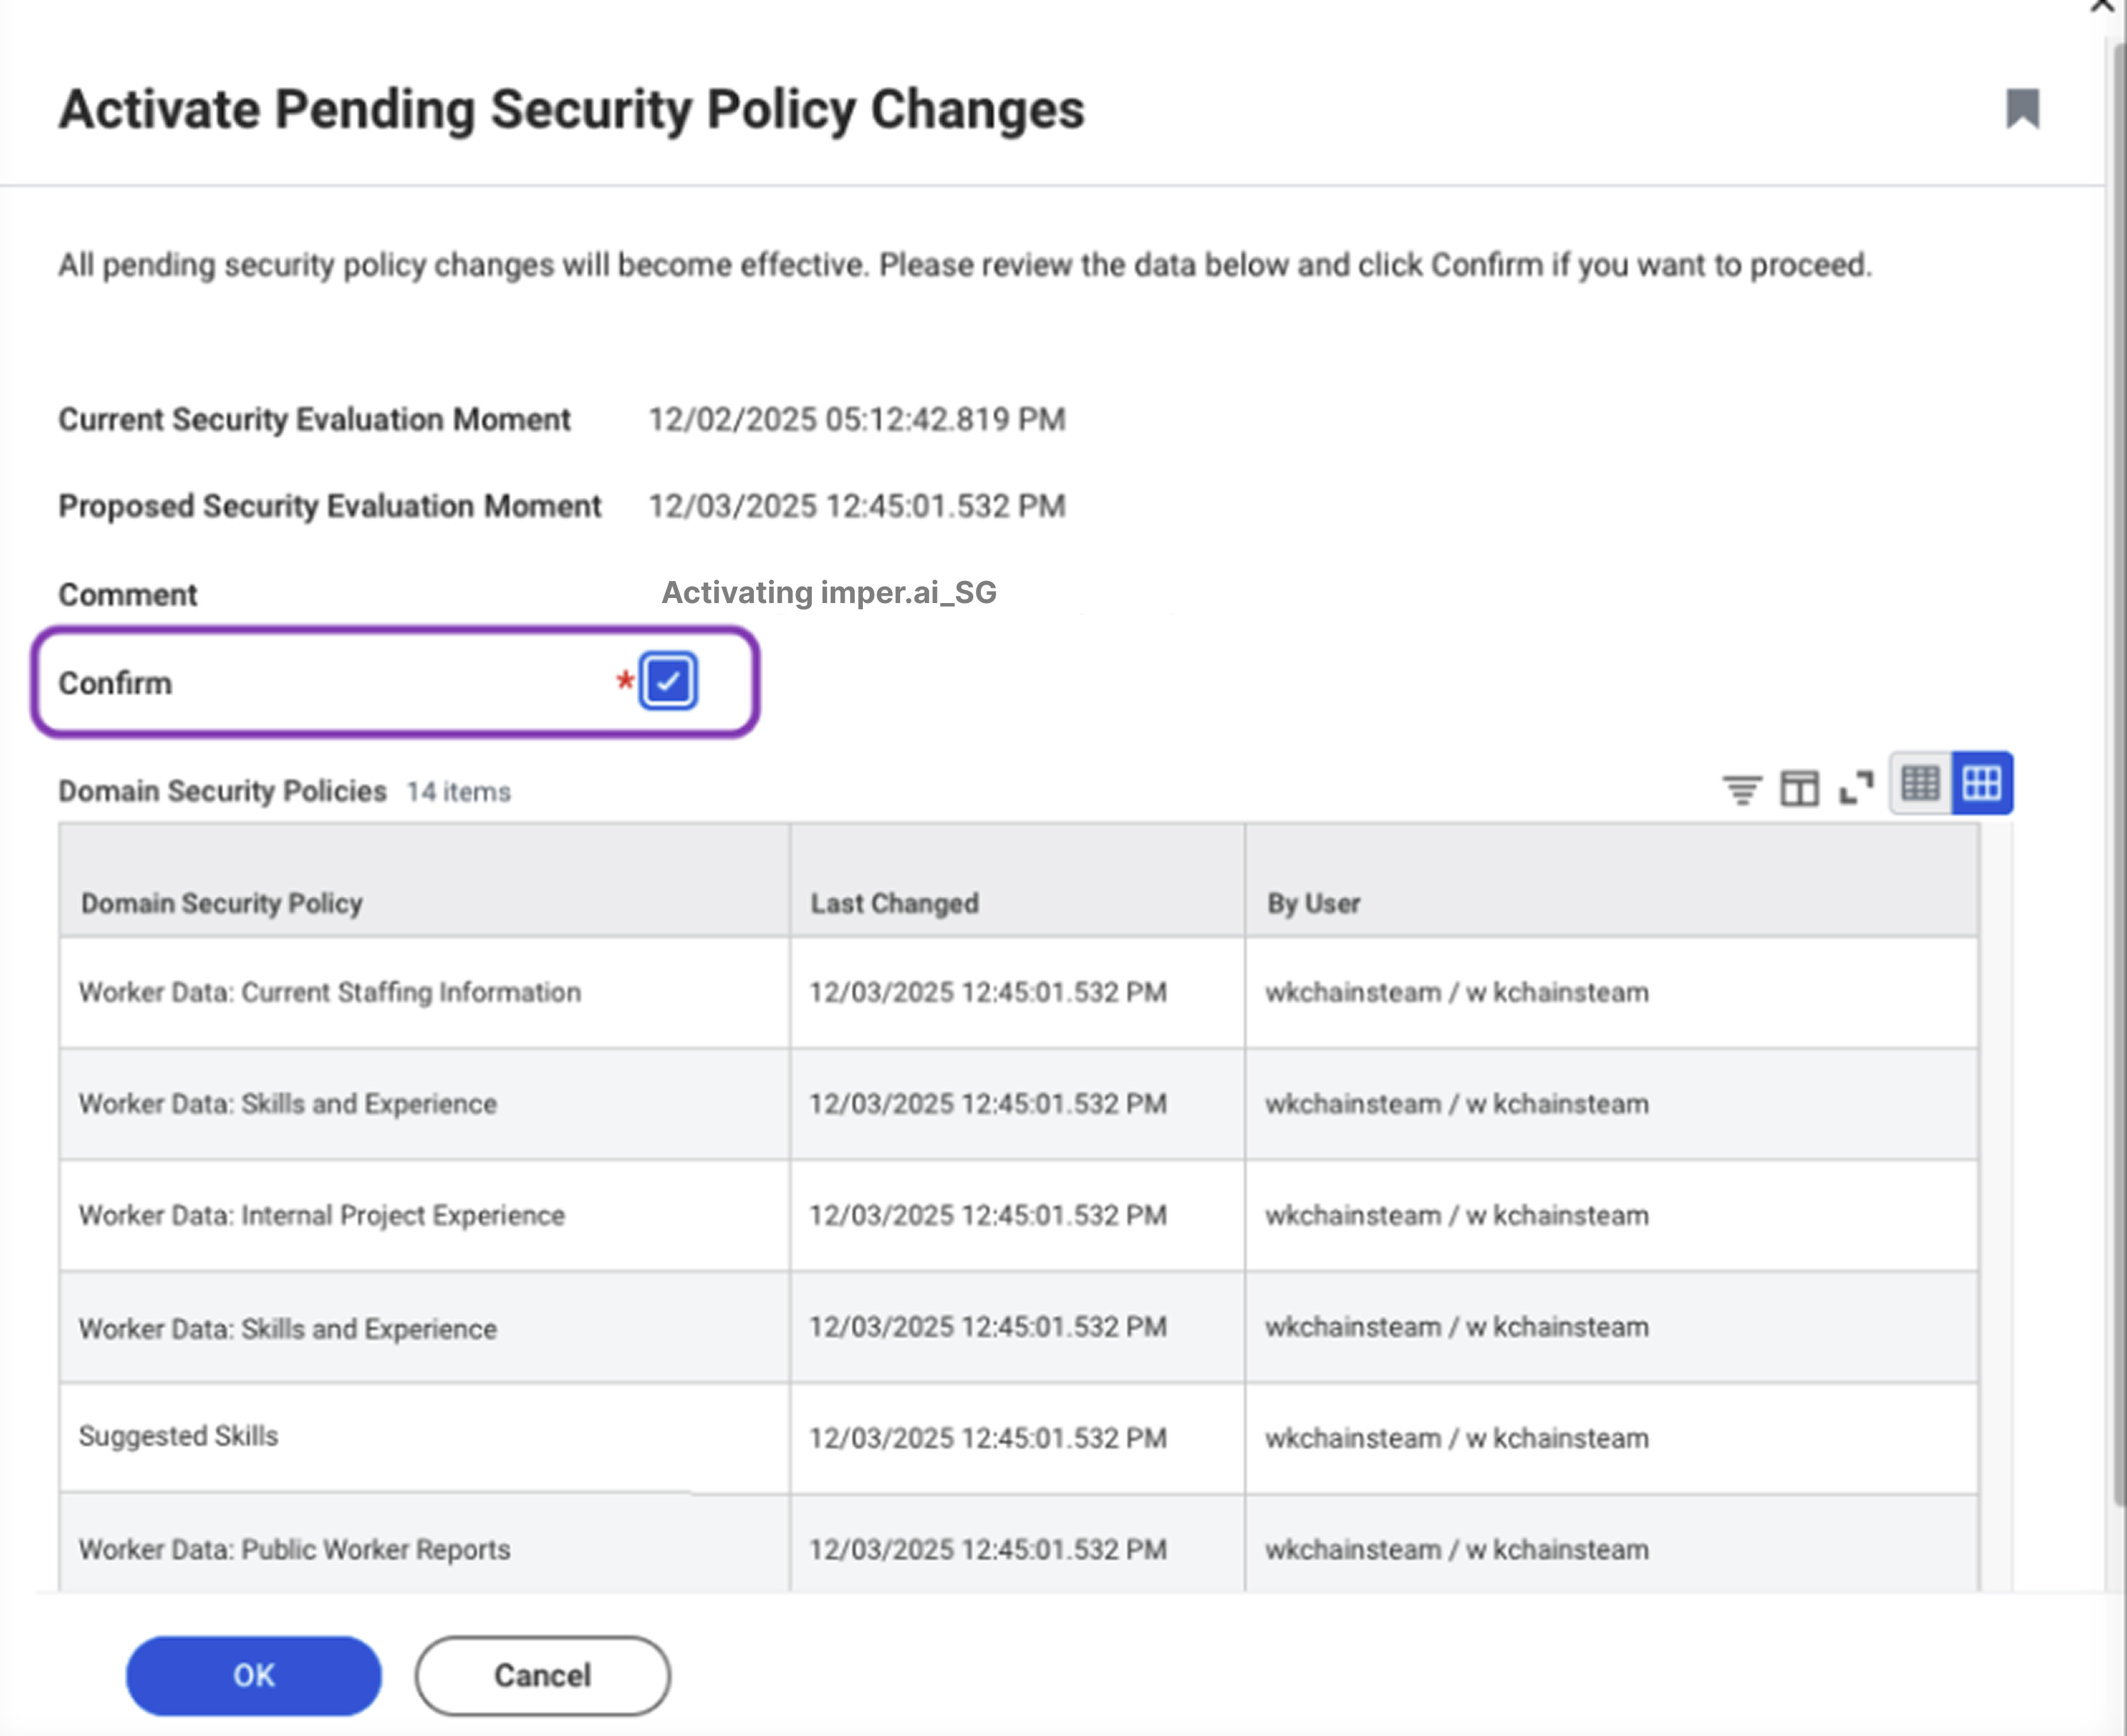
Activate Security Policy Changes
Step 5: Register an API Client & Generate Credentials
Get Your WSDL URL
Search for "Public Web Services" and open the report
Find Recruiting in the list
Hover over it → click the three dots (...) → select Web Service > View WSDL
On the page that opens, scroll to the very bottom
Copy the URL. it will look like: https://wd5-services1.myworkday.com/ccx/service/{tenant}/Recruiting
Step 6: Connect Workday to imper.ai
Login to imper.ai as an admin user
Navigate to Integrations page
Search for Workday and click Connect
A dialog will be opened insert the following fields and click Connect
ISU Username
ISU Password
WSDL URL
Webhook URL
.png)
imper.ai admin console: Workday integration