
Appearance
Verification Policies let admins define which verification questions and rules apply to each department, instead of using a single configuration organization-wide. Departments that handle more sensitive requests - for example, Finance - can be held to a stricter policy than general staff.
Accessing Verification Policies
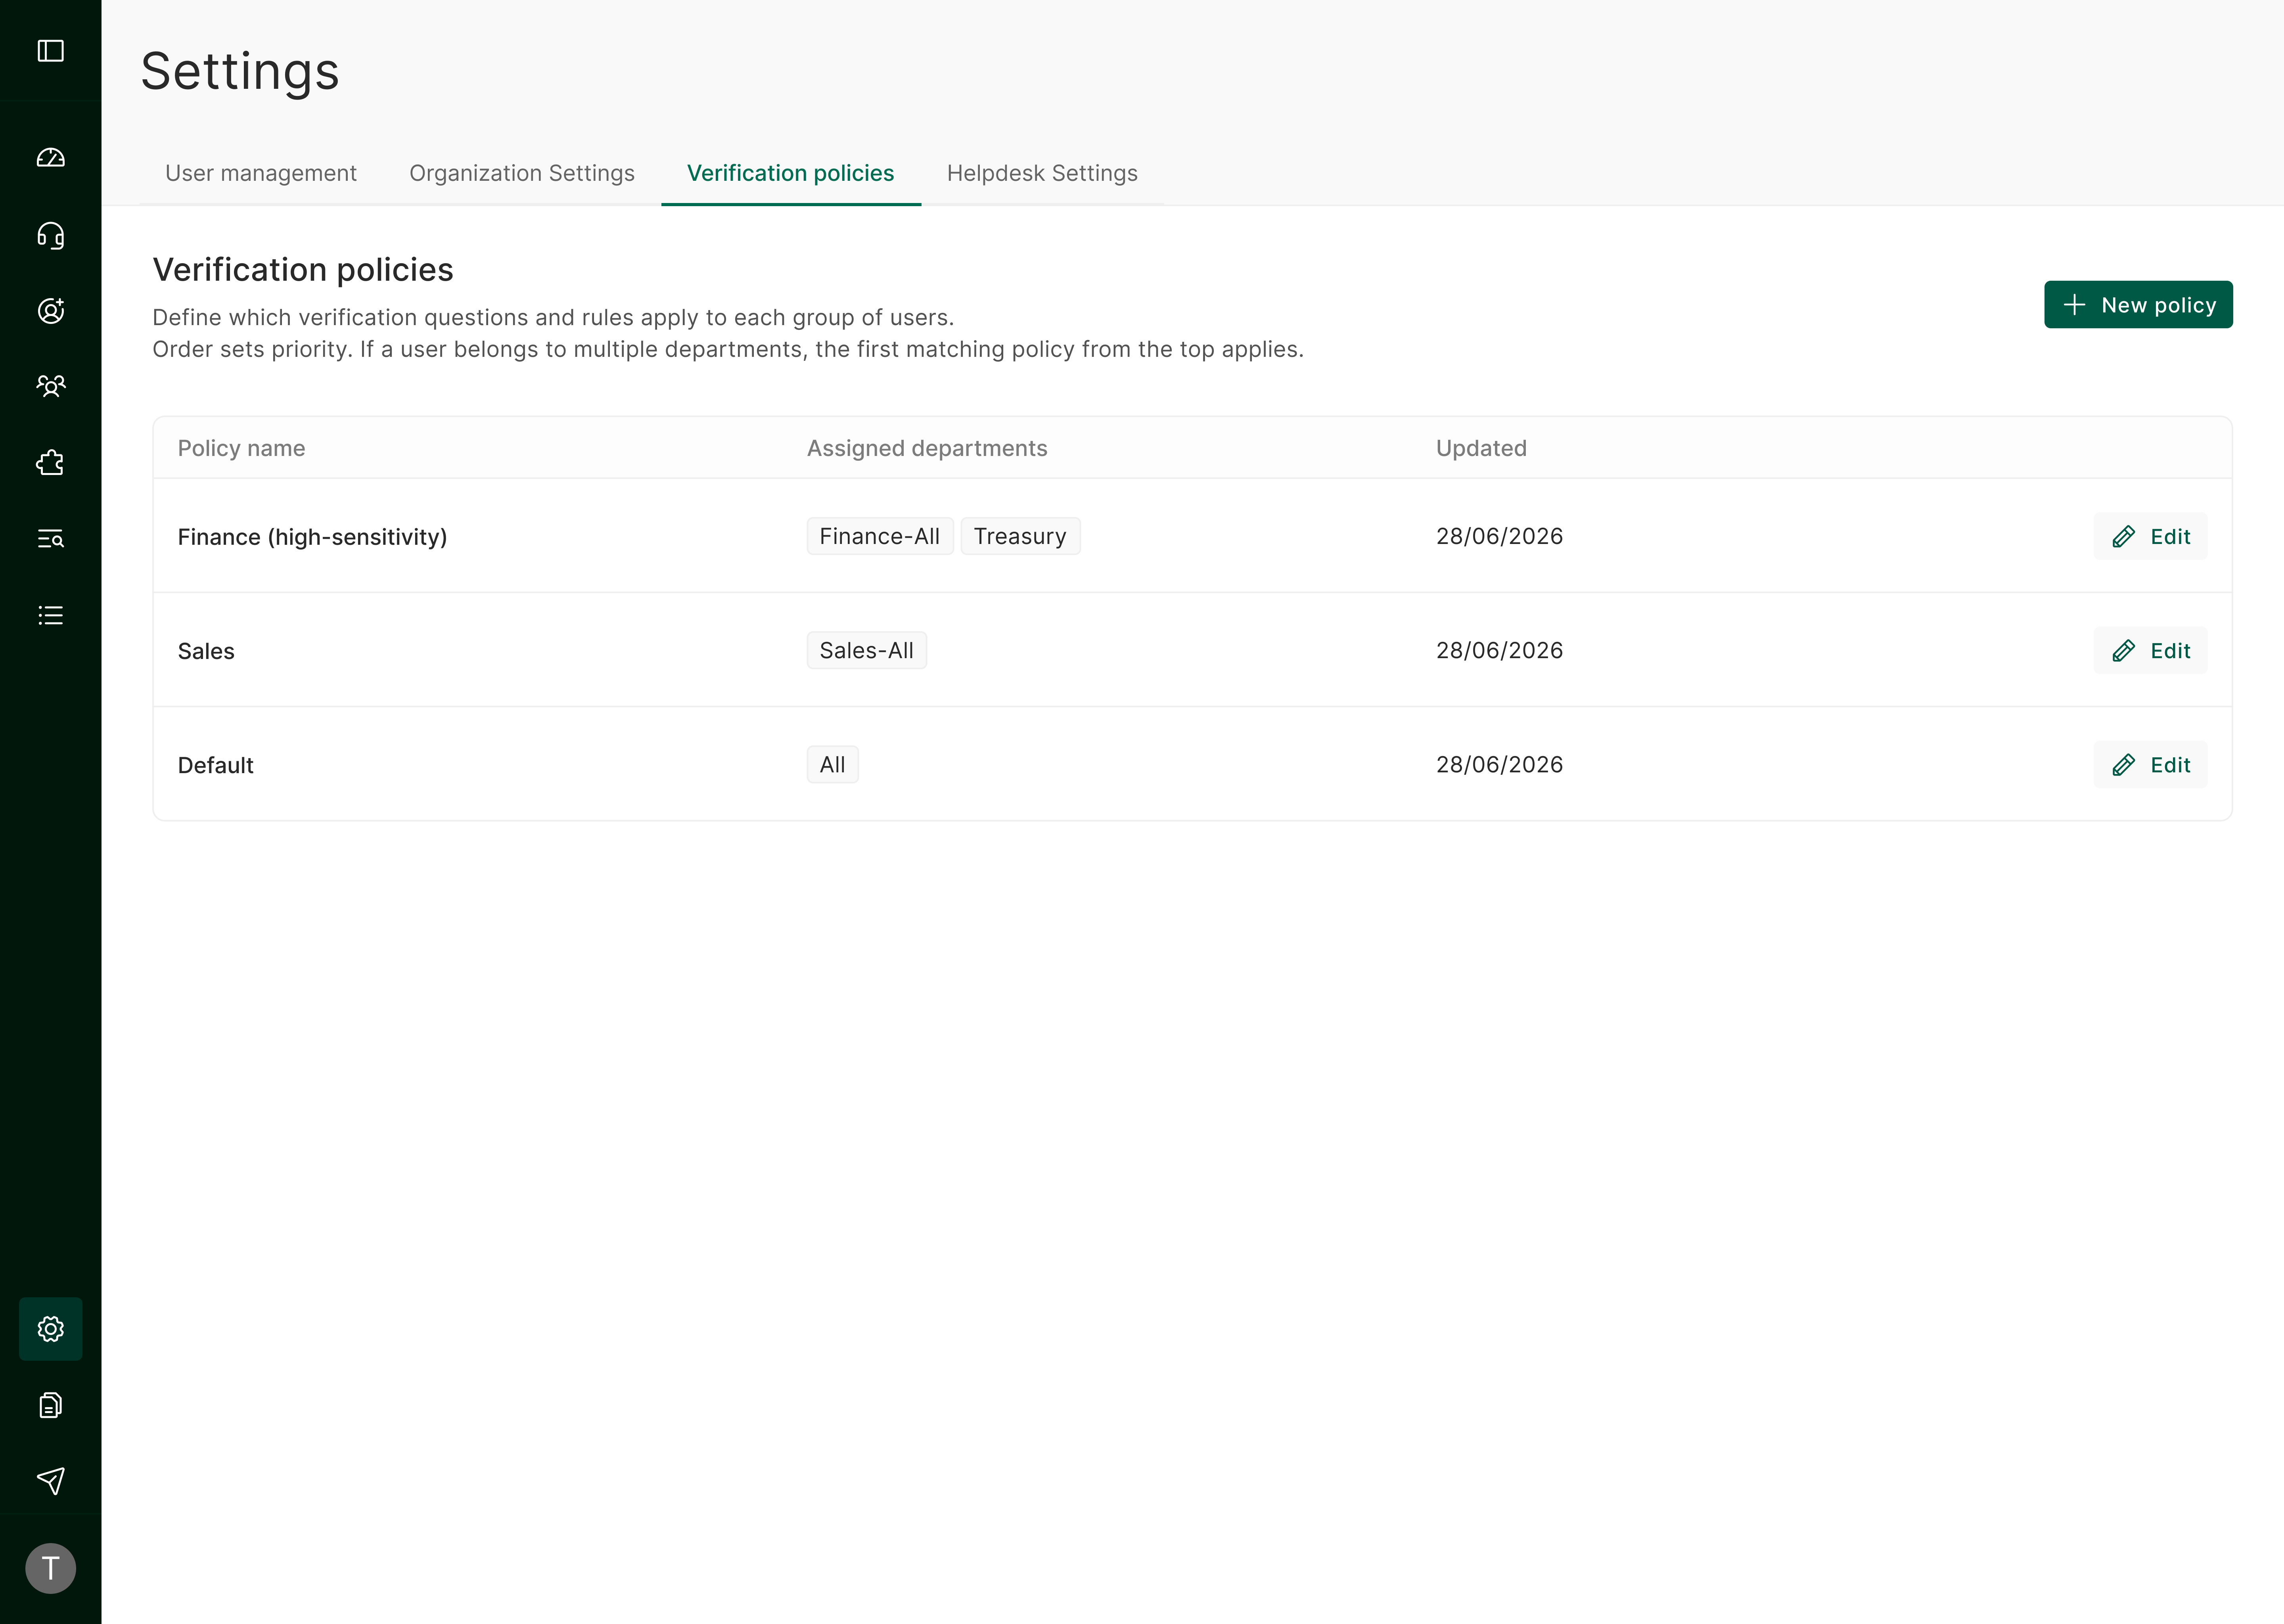
Go to Settings > Verification Policies to see the list of policies configured for your organization, along with the departments each one is assigned to and when it was last updated.
How Policies Work
- Every organization starts with a Default policy, which cannot be deleted. It guarantees that any department not explicitly assigned to another policy still has a working configuration.
- A policy can be assigned to one or more departments, but each department can only be assigned to a single policy at a time.
Managing Policies
Creating a Policy
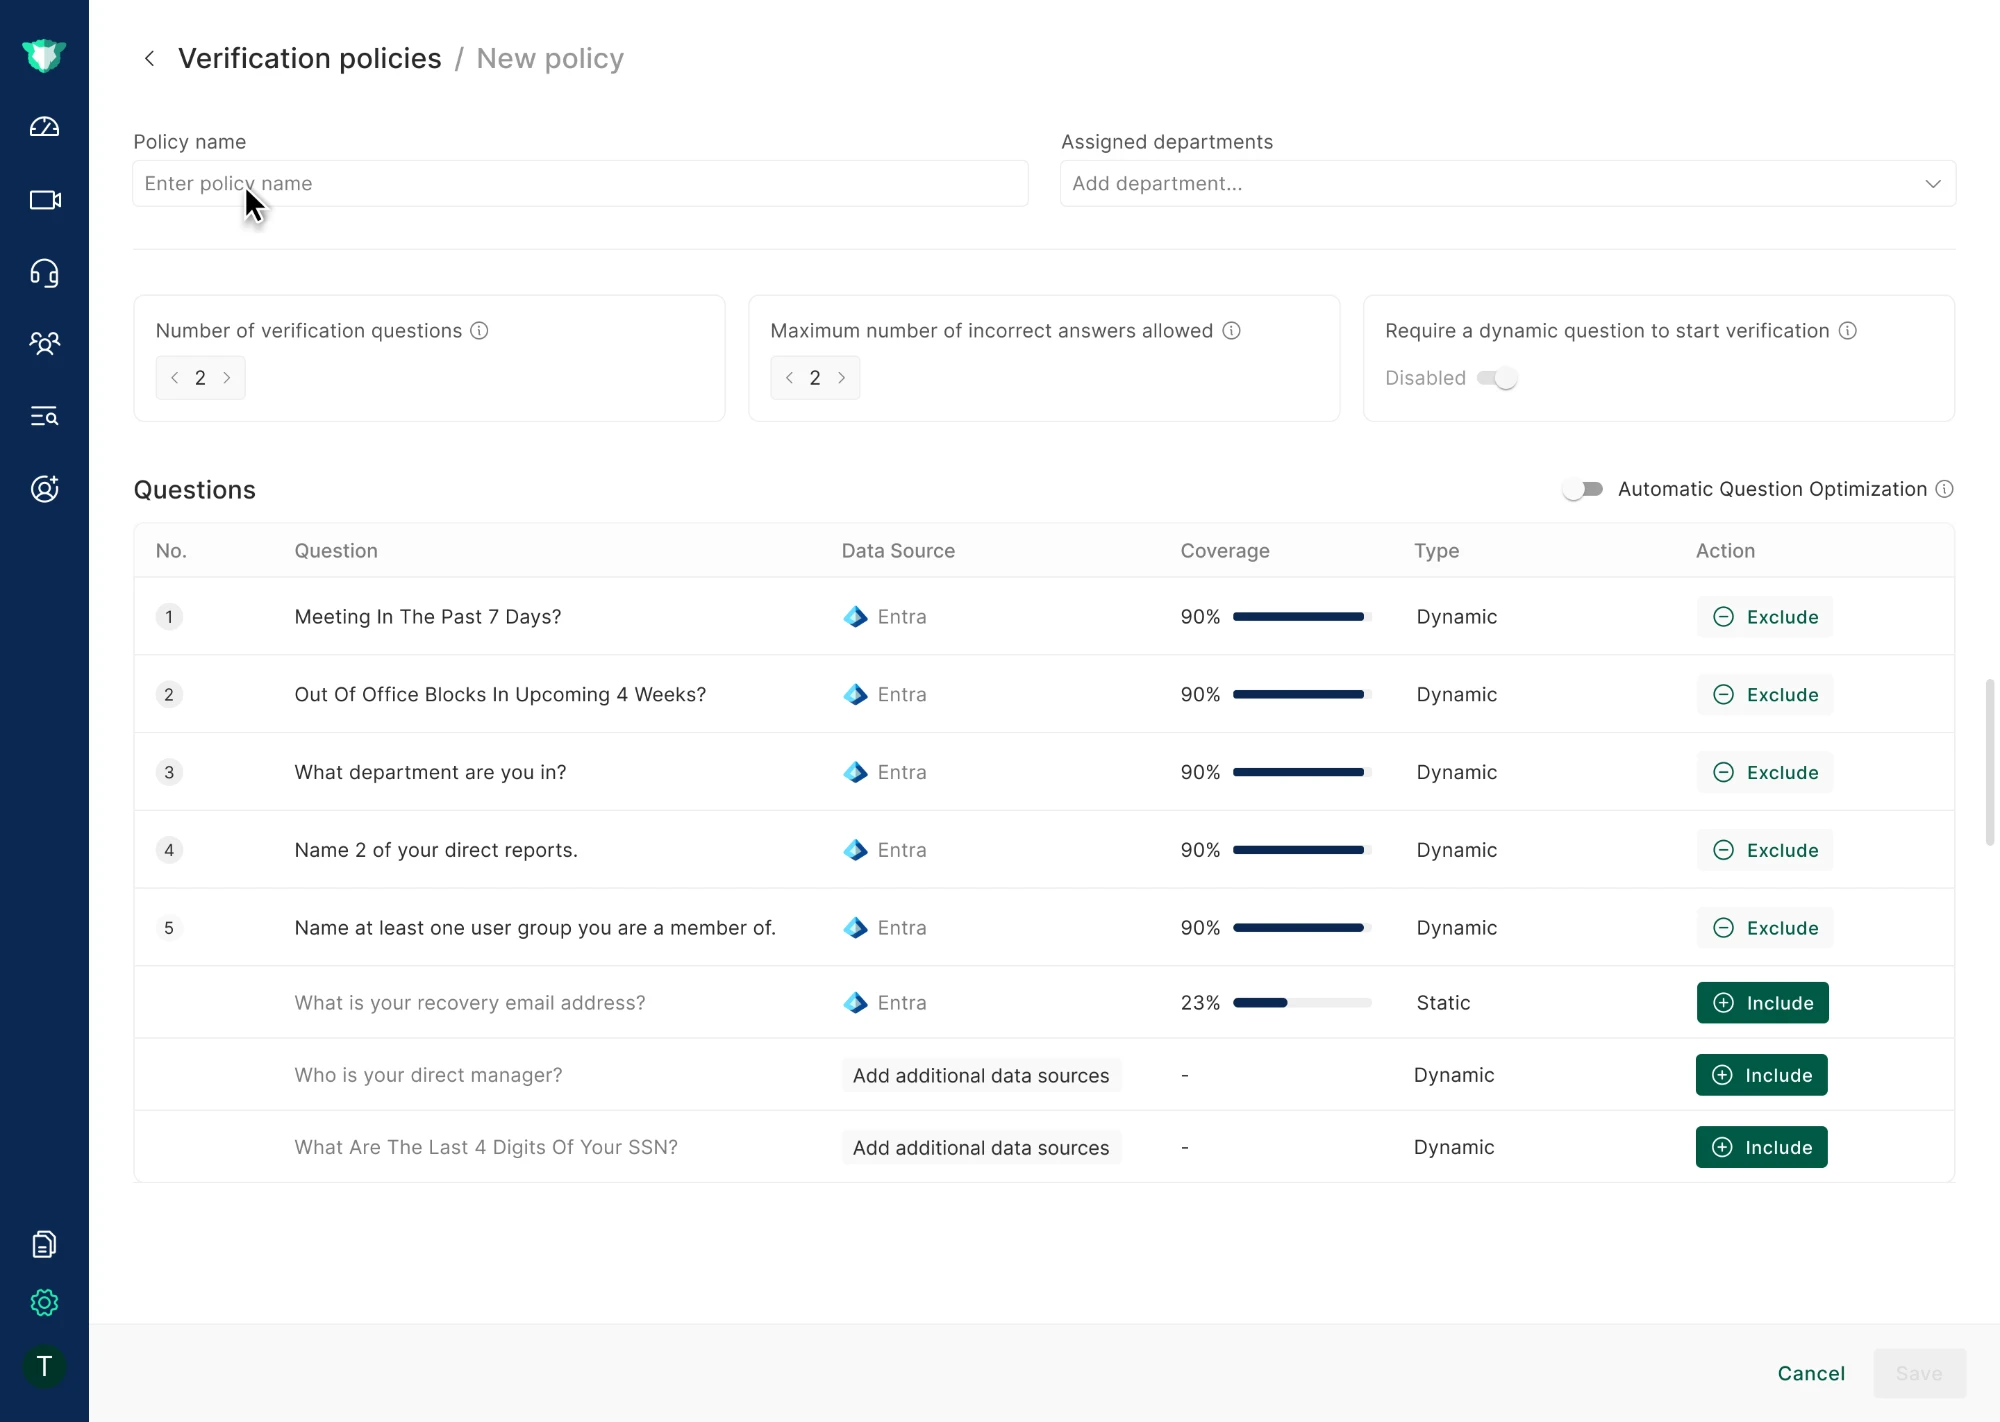
Click New Policy, give it a name, and assign the departments it should apply to.
Editing a Policy
Click Edit on a policy to change its name, assigned departments, or configuration (see Policy Settings below). Click Save - a "Changes saved" confirmation appears.
Deleting a Policy
Click Delete policy on the policy you want to remove. A confirmation dialog names the departments it currently applies to: "This policy currently applies to [departments]. Once deleted, users associated with groups will be verified using the Default policy instead. Are you sure?" Choose Cancel or Delete. Once deleted, a "'[Policy]' policy deleted" confirmation appears.
NOTE
The Default policy cannot be deleted.
Policy Settings
Each policy has its own configuration:
| Setting | Description |
|---|---|
| Policy Name | Identifies the policy in the list and when assigning departments. |
| Assigned Departments | The departments this policy applies to. Each department can belong to only one policy. |
| Risk threshold | The risk level this policy will tolerate. Every verification is scored from the signals collected during the session, and anything above the threshold is failed automatically. The Maximum risk level allowed is the highest score still considered Passed; scores above it are marked Failed. |
| Number of verification questions | How many dynamic questions a user must answer as part of verification under this policy. |
| Maximum number of incorrect answers allowed | How many wrong answers are tolerated before verification fails. |
| Require a dynamic question to start verification | When enabled, verification must begin with a dynamic question rather than relying on silent checks alone. |
| Automatic Question Optimization | When enabled, imper.ai automatically adjusts which questions are asked to improve coverage. |
| Questions | The list of verification questions available to the policy, with their data source, coverage, and type. Individual questions can be excluded. |
NOTE
Verification data sources cannot be configured per policy - every policy uses the same organization-wide data sources.