
Appearance
Overview
Integrating Iru with imper.ai allows the platform to securely push ephemeral data-collection scripts to your managed Apple devices through your existing Iru tenant.
Once connected, imper.ai creates a dedicated Custom Script Library Item scoped to a Blueprint of your choice, runs the collector during normal device check-ins, and removes the item once collection completes - leaving no persistent artifact on the device.
This article walks you through the required prerequisites and the steps for creating an API token, granting the required permissions, identifying the target Blueprint(s), and completing the integration inside imper.ai.
NOTE
Kandji has rebranded to Iru. The Iru web app and API URLs may still display "kandji" during the transition (e.g., *.api.kandji.io). This is expected and does not affect the integration.
Prerequisites
To integrate Iru with imper.ai, you must have Iru tenant admin permissions (or equivalent privileges to create API tokens and manage Blueprints) via the Iru web app.
We also recommend creating a dedicated Blueprint for imper.ai (e.g., imper-collectors) and assigning the devices you want imper.ai to manage to it. This ensures imper.ai's scripts are scoped only to that Blueprint and never touch your other configurations.
Setup
Step 1: Create an API token in Iru
Using an Iru admin user, log in to your Iru web app.
Click the Access tab.
Click the Add API Token tab.
Enter a Name (e.g.,
imper.ai) and a Description, then click Create.Copy the generated API Token to a secure location - this token needs to be entered later in imper.ai's integration interface.
Important: The token is displayed only once. If you lose it, you must revoke it and generate a new one.
Copy the API URL displayed on the Access page. It will follow one of these formats:
- US tenants:
https://<subdomain>.api.kandji.io - EU tenants:
https://<subdomain>.api.eu.kandji.io
- US tenants:
Step 2: Configure API token permissions
After creating the token, you must grant it the specific permissions imper.ai requires. On the token's permissions page, enable only the following:
Blueprints:
- Get Blueprint
- List Blueprints
- Update Blueprint
- List Library Items
- Assign Library Items
Custom Scripts (enable all):
- Create Custom Script
- Update Custom Script
- List Custom Scripts
- Get Custom Script
- Delete Custom Script
Devices:
- Device ID
- Device List
- Device Details
- Device Status
- Device Activity
- Device Library Items
- Device Parameters
Device Actions:
- Send Blank Push
Click Save to apply the permissions.
Note: imper.ai requires no permissions beyond those listed above. Granting additional permissions does not enable additional functionality and is not recommended.
Step 3: Connect Iru to imper.ai
- Locate Iru and click Connect.
- In the integration dialog, fill in the API URL and API Token obtained in Step 1.
- Click Connect. imper.ai will validate the credentials and verify the token permissions.
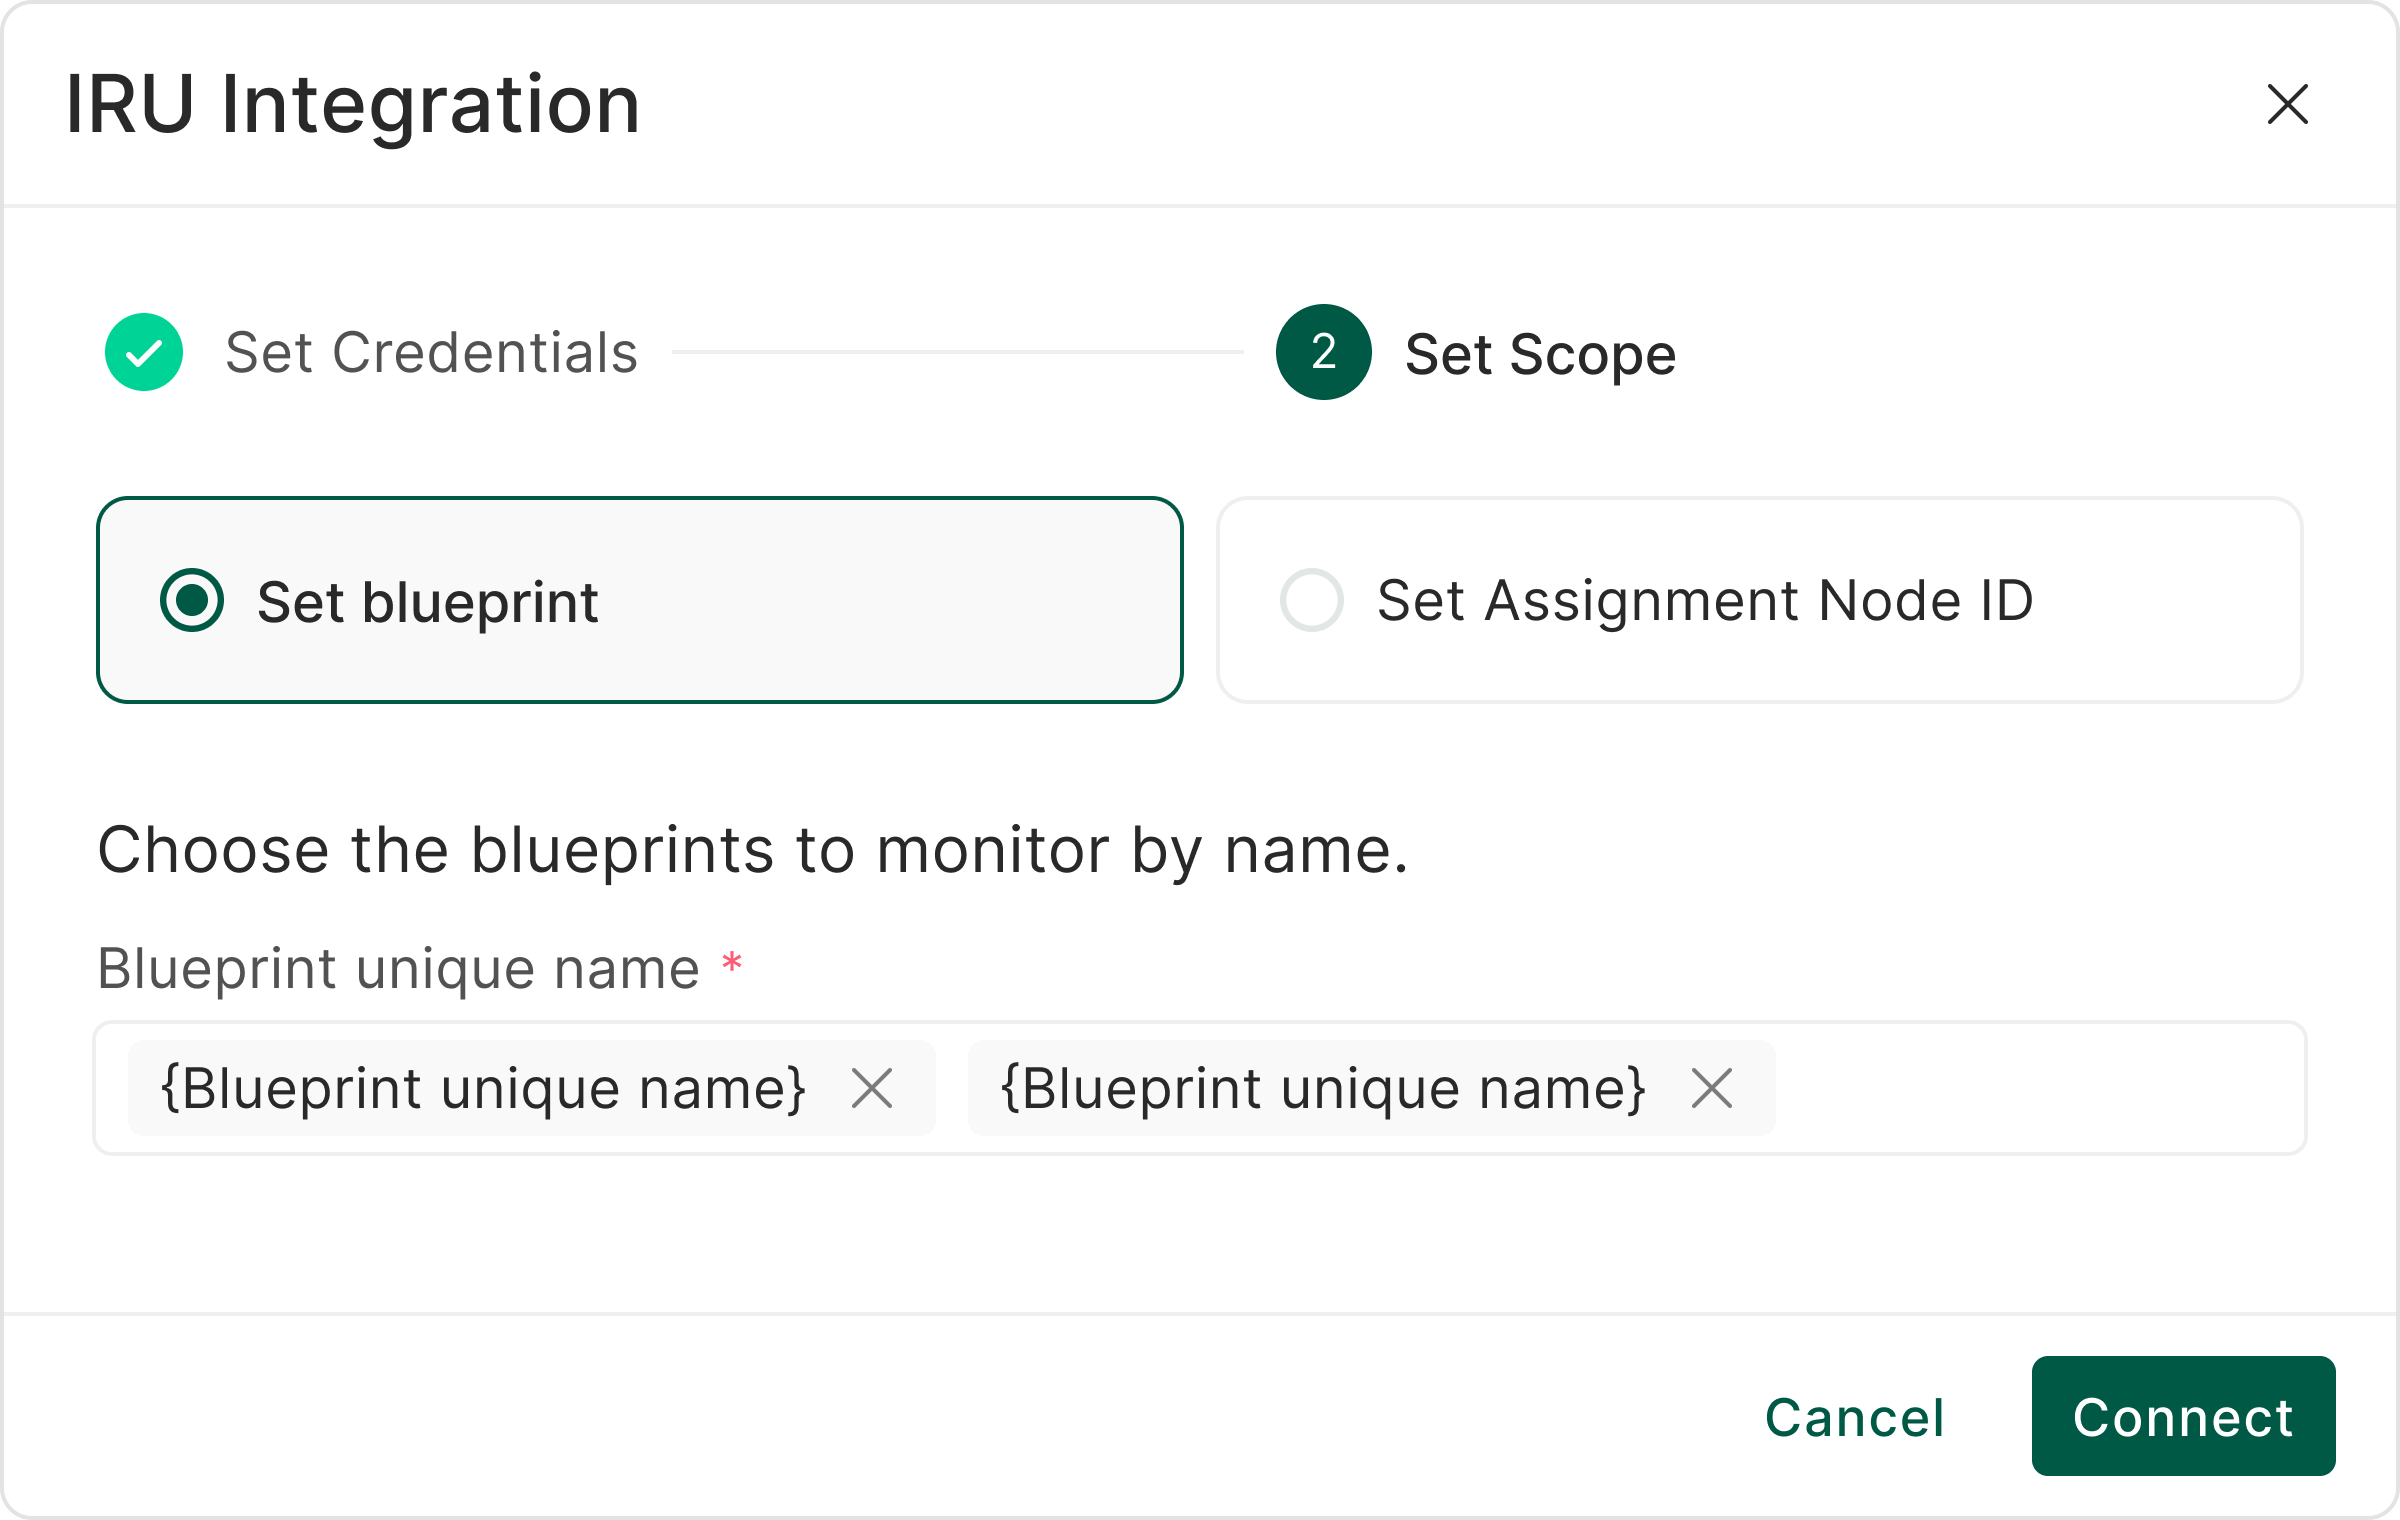
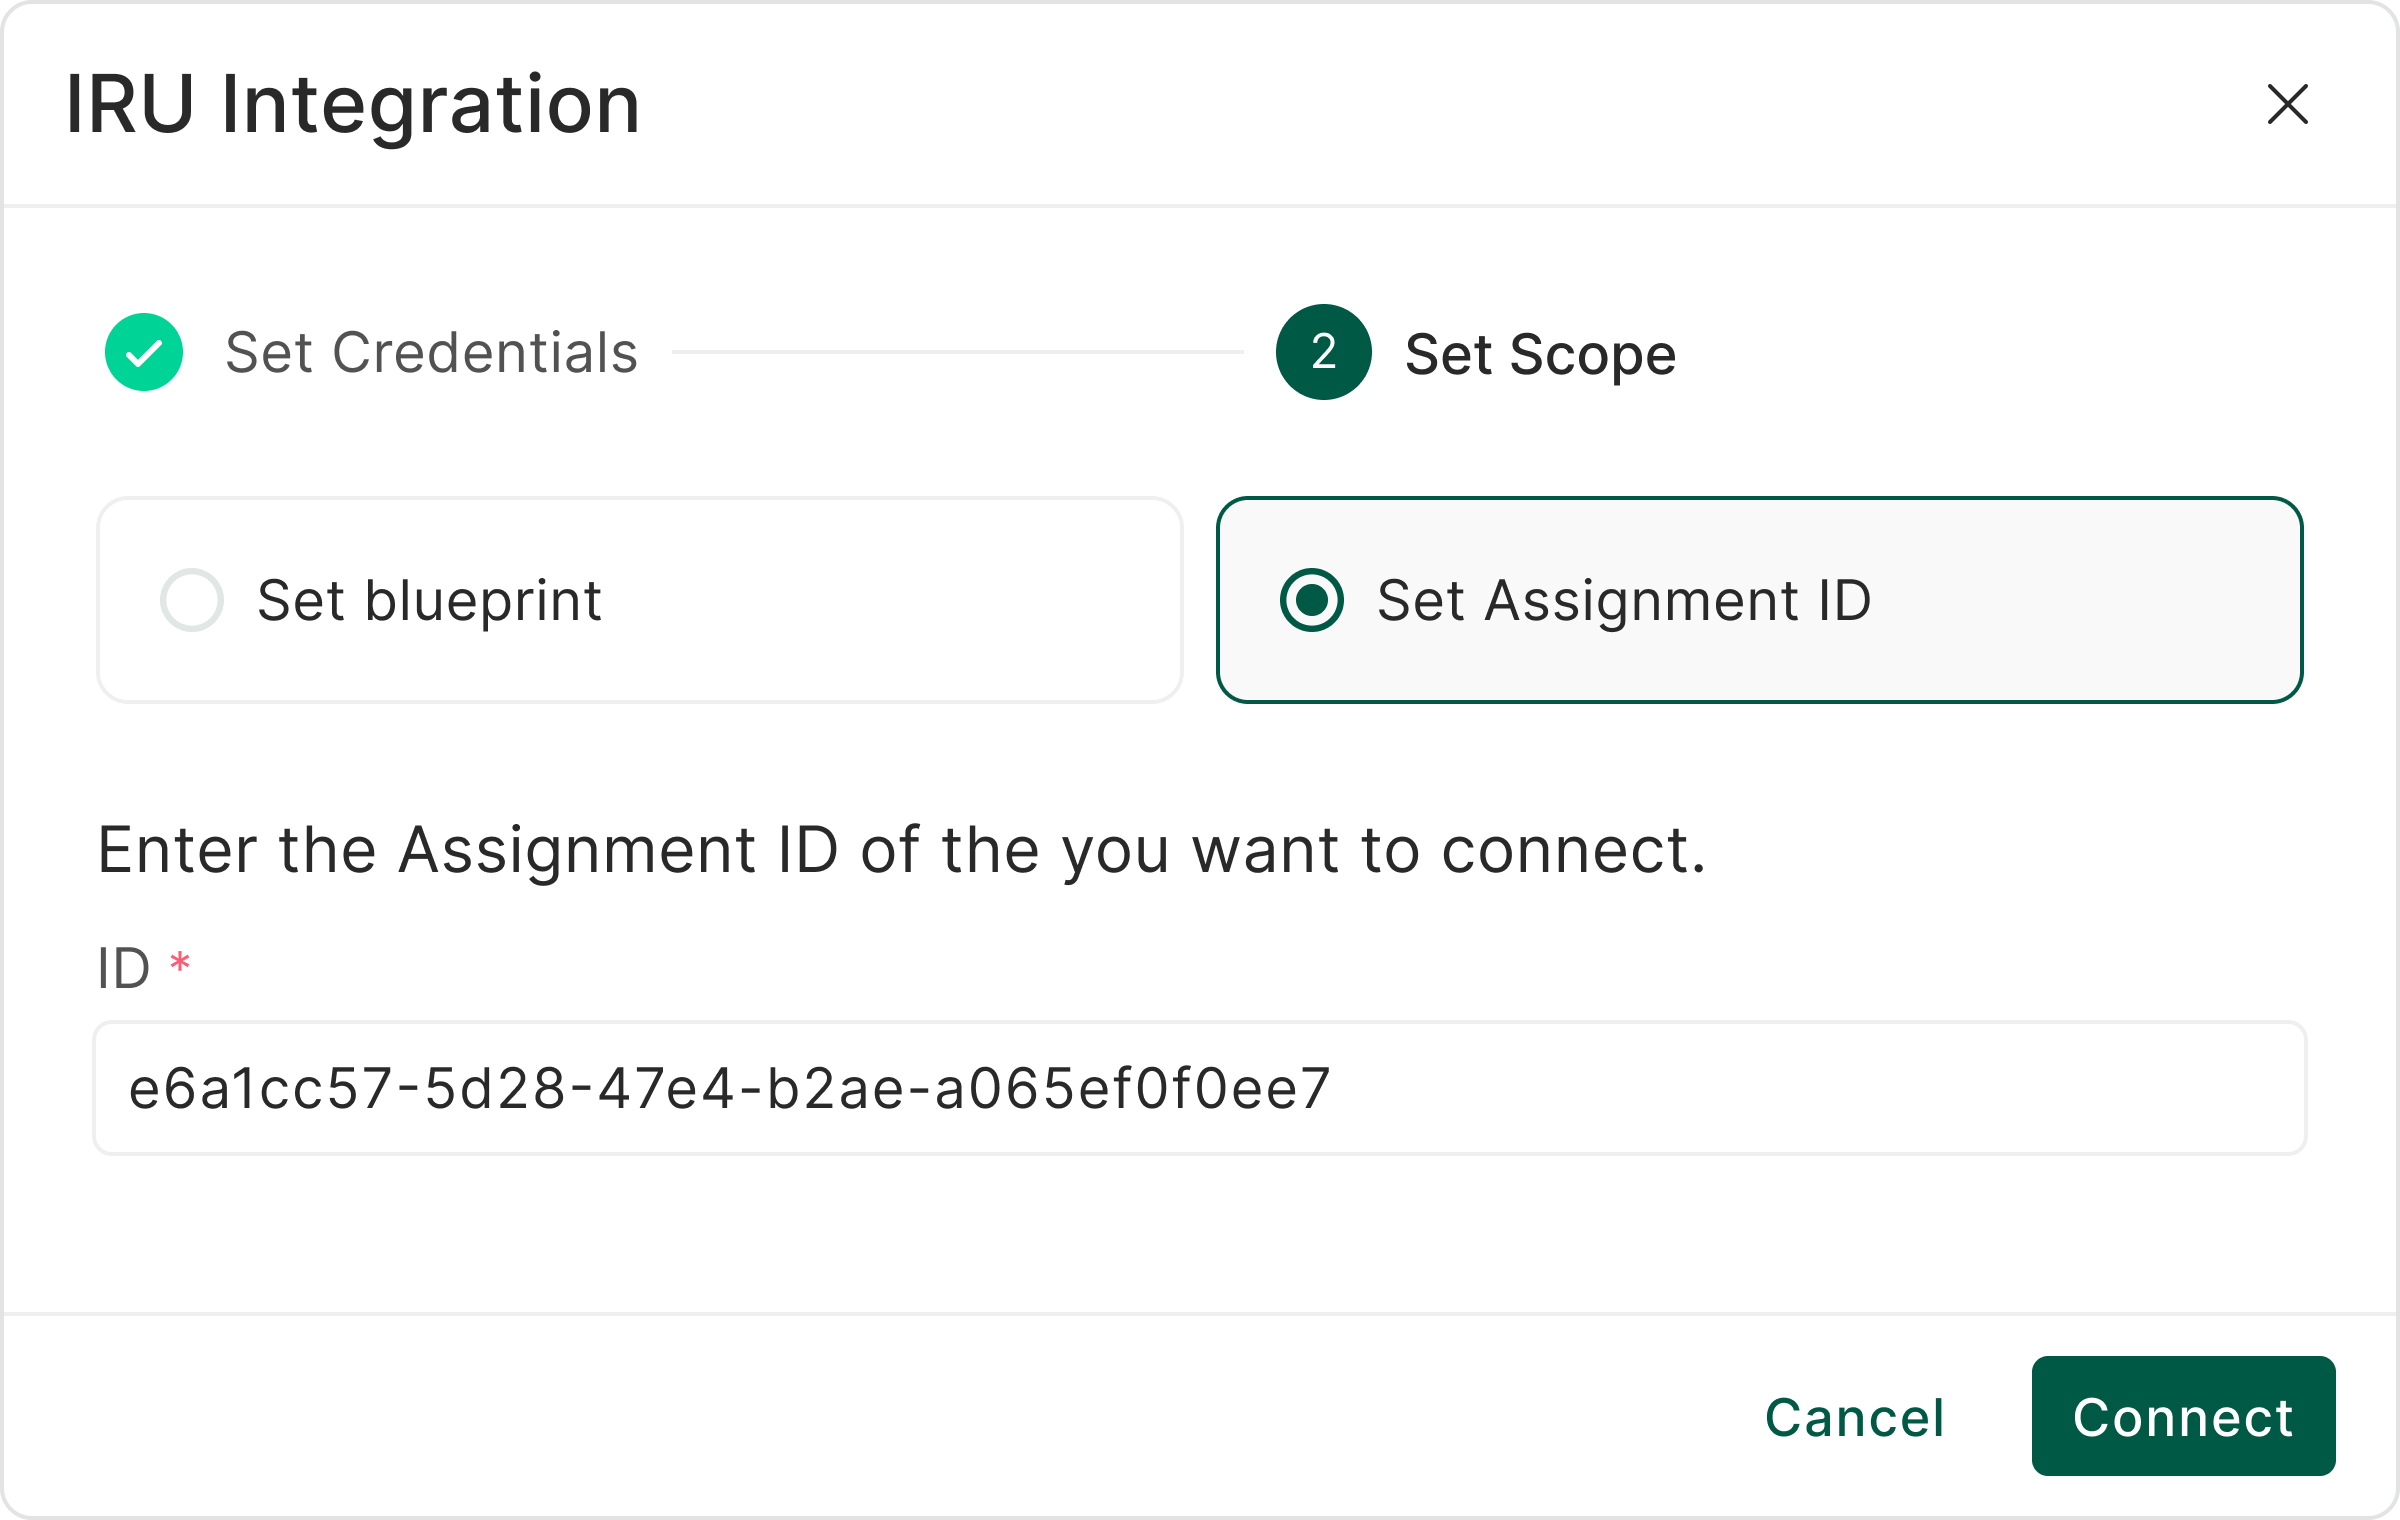
- Once validated, choose one of two setup options: Set Blueprint or Set Assignment ID.
Choose a setup option
Option 1: Set Blueprint
- Start typing to search for one or more Blueprints by name, then select them.
- Click Save to begin monitoring all devices included in the selected blueprints.
Option 2: Set Assignment ID
Before extracting an Assignment ID, make sure the assignment map includes conditional logic that scopes the script to the devices you want imper.ai to monitor. If no conditional logic exists yet, add it.
Step 1: Tag the devices you want to monitor
Use the Tag feature in Iru to label the devices you want monitored by imper.ai. For example, apply the tag imper-verification to those devices.
Step 2: Add conditional logic to the assignment map
- Navigate to Blueprint → Assignment Map.
- Click Add conditional logic.
- Add an assignment rule to limit which devices in the blueprint receive the library item, using the following condition:
- Input: Tags
- Operator: contains one of
- Value:
imper-verification
Step 3: Extract the Assignment ID
- Navigate to Blueprint → Assignment Map.
- Press and hold the Option key on your keyboard. The
assignment_node_idbecomes visible on the node. - Click Copy, then paste the ID into the dialog.
Step 4: Save
Click Save to begin monitoring only the devices tagged imper-verification.
Managing the Integration
Adding or changing Blueprints
You can update the Blueprints assigned to the imper.ai integration at any time without re-entering your API credentials.
- Navigate to the imper.ai admin integrations page.
- Locate Iru and click Edit.
- Add or remove Blueprints using the search field.
- Click Save to apply the changes. imper.ai will immediately begin scoping scripts to the updated Blueprint selection.
NOTE: Removing a Blueprint from the integration stops imper.ai from deploying new scripts to devices in that Blueprint. It does not affect devices in Blueprints that remain selected.
Related articles
- Integrating Autotask with imper.ai - Integrations > Internal Systems
- Integrating Okta with imper.ai - Integrations > Internal Systems
- Getting Started with imper.ai - Platform Overview
Need help or have a question? support@imper.ai