
Appearance
Verify with document confirms a user's identity through a government-issued document, using a third-party document verification provider (currently Didit). When enabled, it runs automatically as an extra layer whenever a verification is inconclusive, so the user can still prove who they are without a call or manager approval.
Availability
Document verification is triggered automatically whenever a verification comes back inconclusive - there isn't enough certainty to let the user proceed, but no clear indications of impersonation were found either. In this situation the identity is uncertain and warrants an extra layer of confirmation. It is not used when a verification surfaces clear signs of impersonation, where the risk is too high to allow a document check to substitute for standard verification, and it isn't needed when a verification passes cleanly.
How It Works
When a user's verification is inconclusive - not enough certainty to let them proceed, but no clear indications of impersonation - imper.ai automatically adds the document verification step - no agent action is required. The user is asked to complete identity verification with a government-issued ID as part of the same flow, and the result of that check sets the final verification outcome:
If the document check passes, the verification is treated as Passed and the user continues to the requested action (for example, resetting their password).
If the document check fails, the verification is marked Failed and the action is blocked.
The End-User Experience
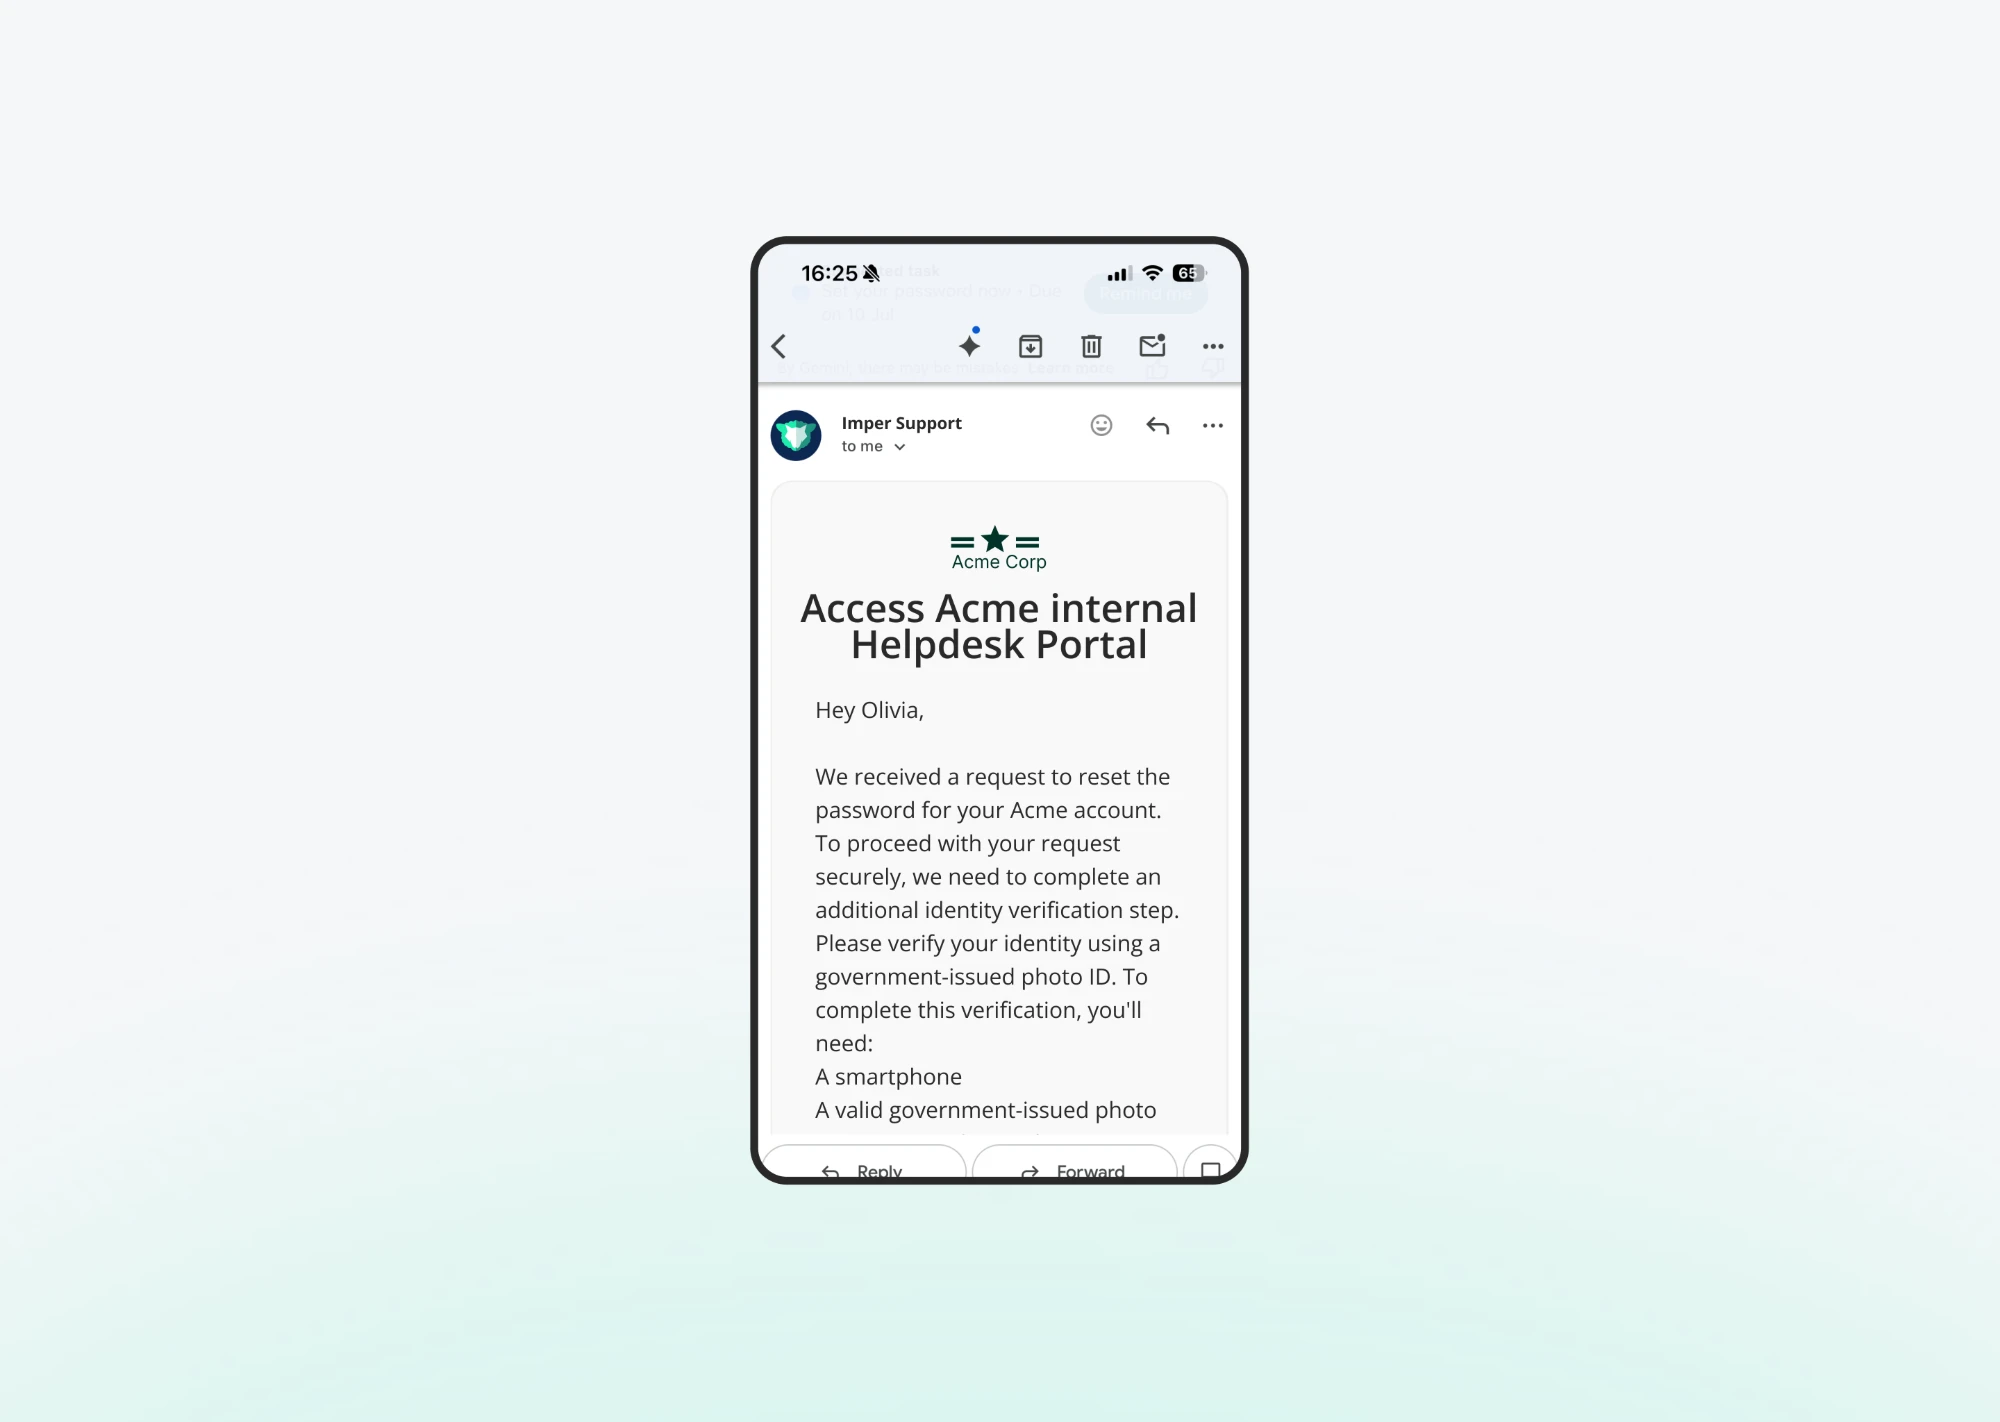
Step 1 - Prompted to verify with a document
When an inconclusive result is detected, the user is automatically asked to complete one more step: identity verification using a government-issued ID. They'll need a smartphone and a valid photo ID (passport, driver's license, or similar).
Step 2 - Complete verification
The user opens the link on their phone and completes document verification through the provider's hosted flow: granting camera access, capturing their document, and completing a liveness check. Once submitted, they see a confirmation screen and continue.
Step 3 - Outcome
imper.ai receives the result from the provider and applies it to the verification.
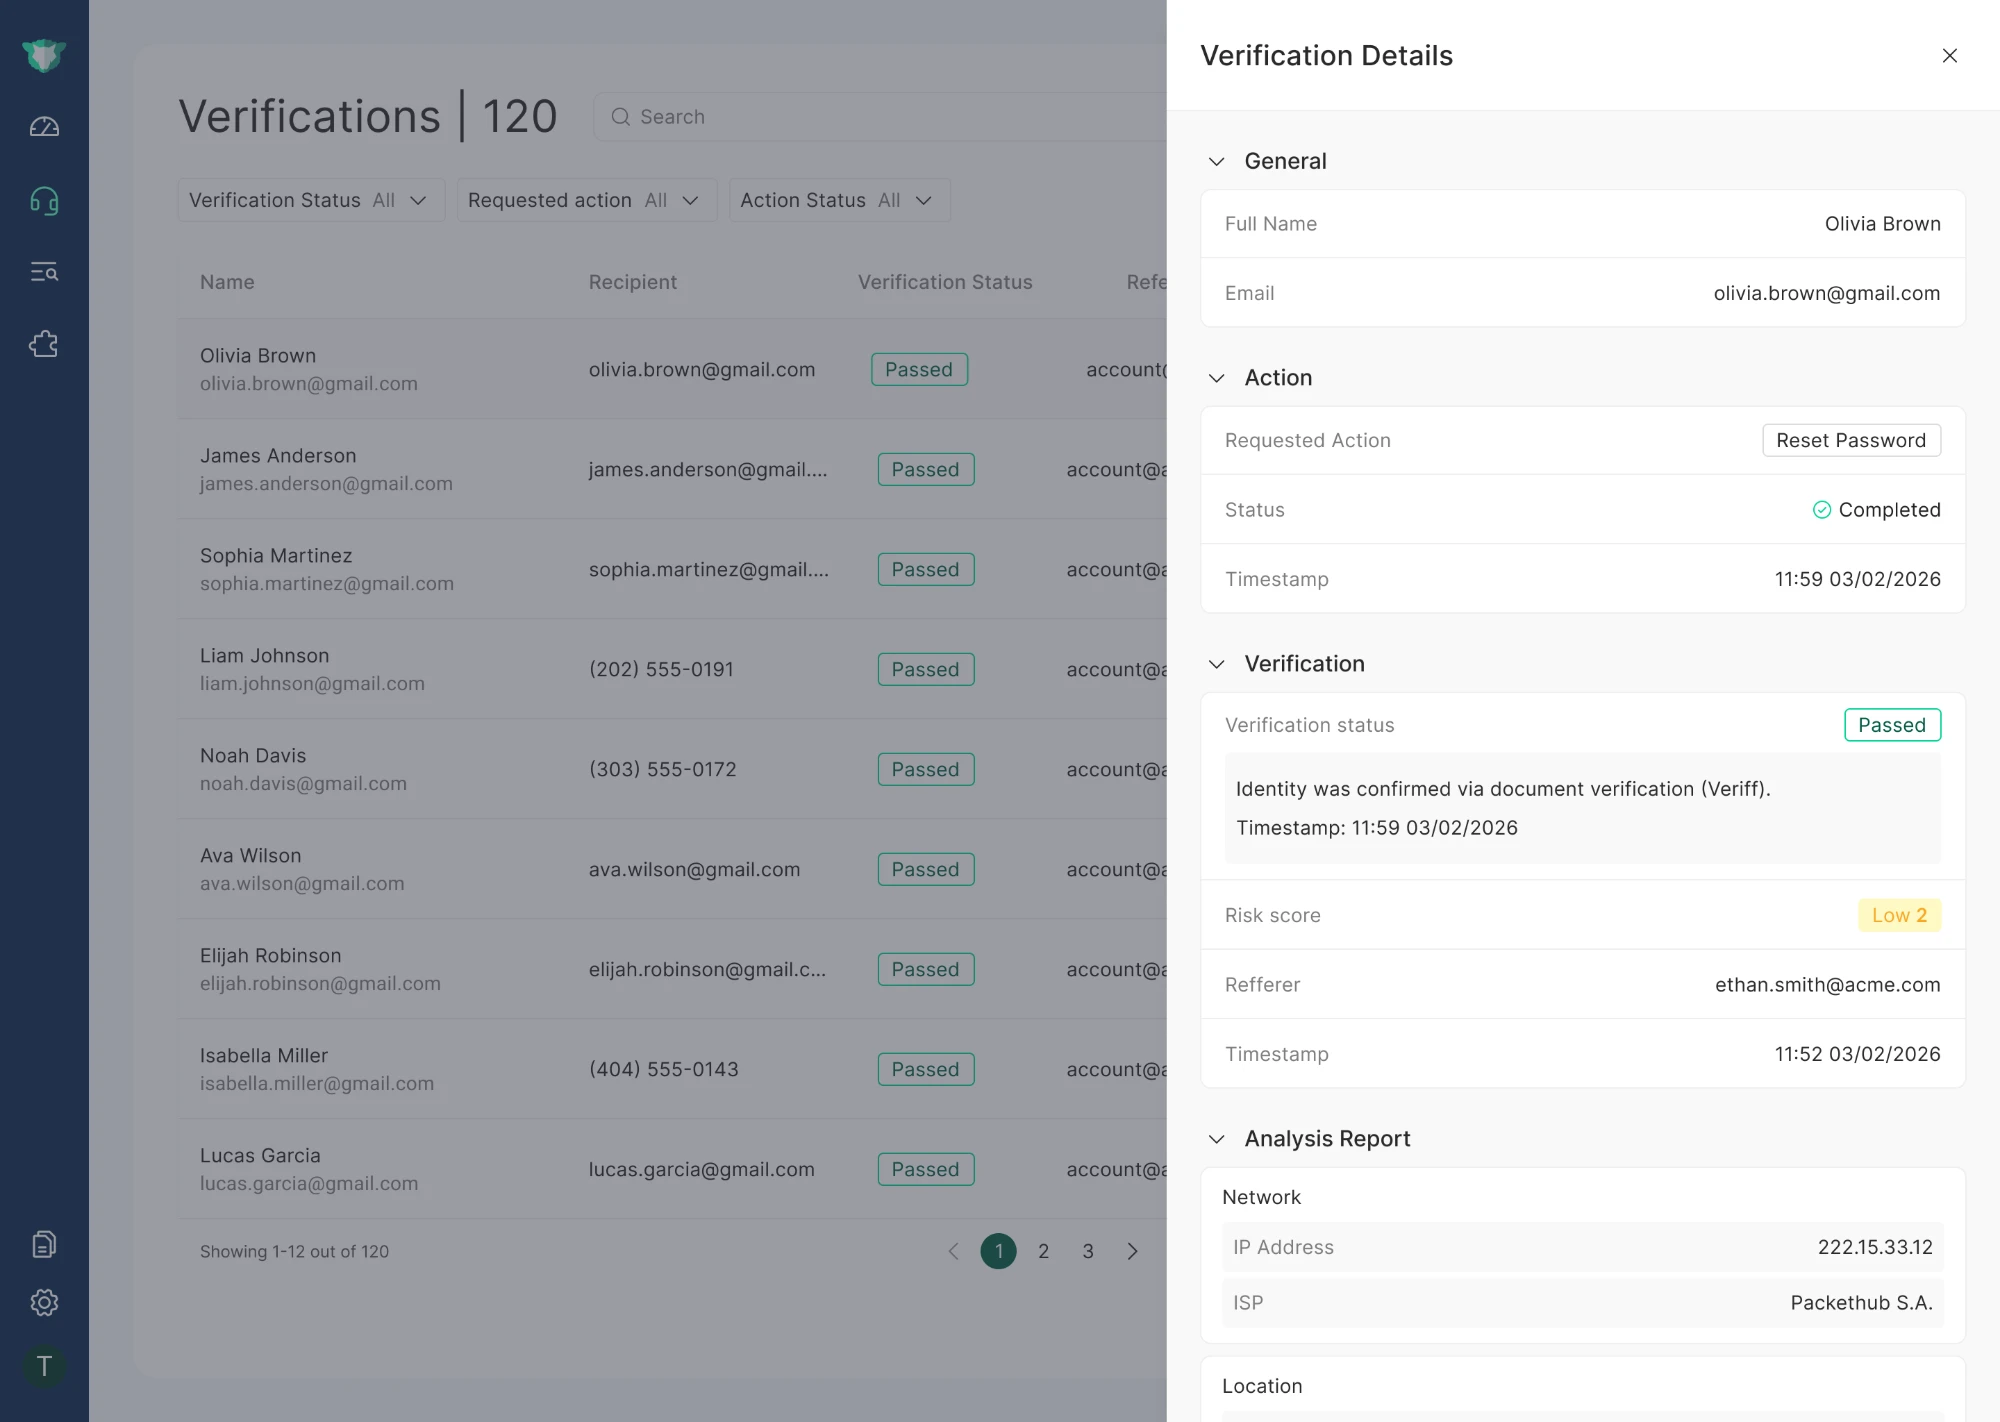
If the document verification is approved:
- The user continues to complete the original request (for example, resetting their password) without further verification.
- The Action Status updates to Completed.
- The verification record shows that identity was confirmed via document verification, and the risk score drops (for example, to Low 2).
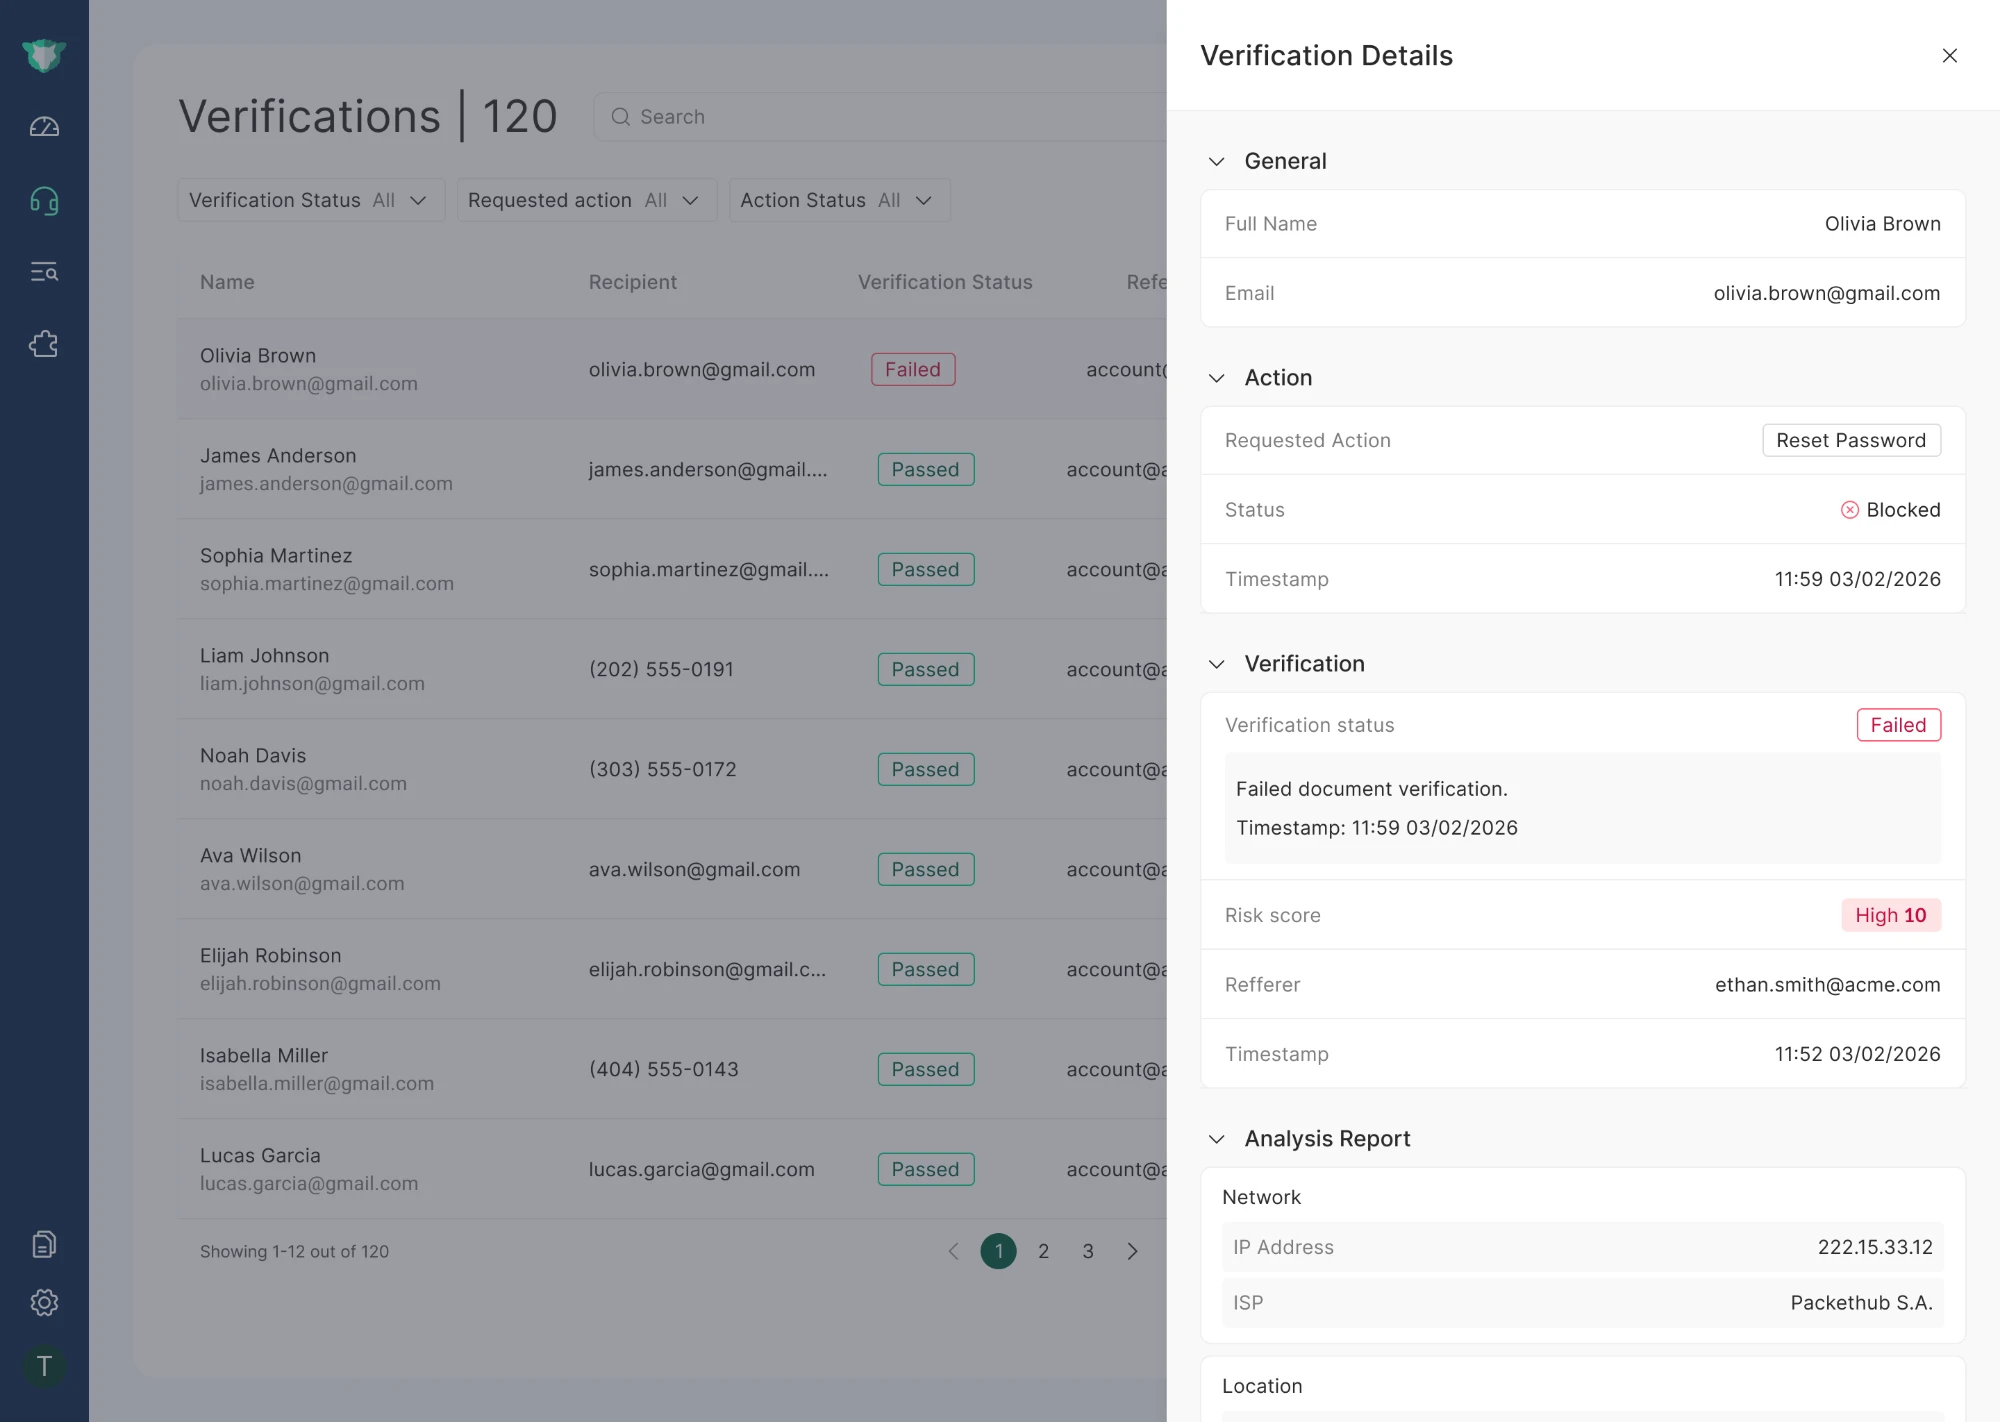
If the document verification is declined or fails:
- The user lands on a "Verification could not be completed" page: "The verification process couldn't be completed at this time. Please contact support for assistance." No link to perform the action is issued.
- The verification status stays Failed, with a note that document verification failed, and the risk score is raised (for example, to High 10).
- The Action Status updates to Blocked.
NOTE
You can integrate your preferred document verification provider, or use the document verification provider available through imper.ai.