
Appearance
Connect your Workday Recruiting tenant to imper.ai with an OAuth API client and a non-expiring refresh token, so imper.ai authenticates with a revocable, scoped token instead of a stored service-account password.
NOTE
The Workday steps require Workday admin access. To connect and manage the integration in imper.ai you need the admin role. OAuth is an alternative to the ISU username/password (WSSE) method - both connect to the same Recruiting API; choose whichever your security policy prefers.
Overview
This integration connects Workday Recruiting with imper.ai to secure interviews throughout the hiring process. It protects and verifies interviews that are managed and scheduled directly within Workday, helping prevent impersonation and candidate fraud.
NOTE
This guide continues from Create ISU for Workday Integration. Complete its Steps 1-5 first (Integration System User, security group, and WSDL URL) - the steps below reuse them.
Here you register an API client and generate a non-expiring refresh token. When you're done, connect in imper.ai using Step 6 of the ISU guide. In OAuth mode imper.ai never stores a Workday password - it holds the refresh token and exchanges it for a short-lived access token on each run.
What you'll set up
| # | Item | From |
|---|---|---|
| 1 | API client Client ID & Client Secret | Step 1 |
| 2 | Refresh token (non-expiring) | Step 2 |
Step 1 - Register the API client
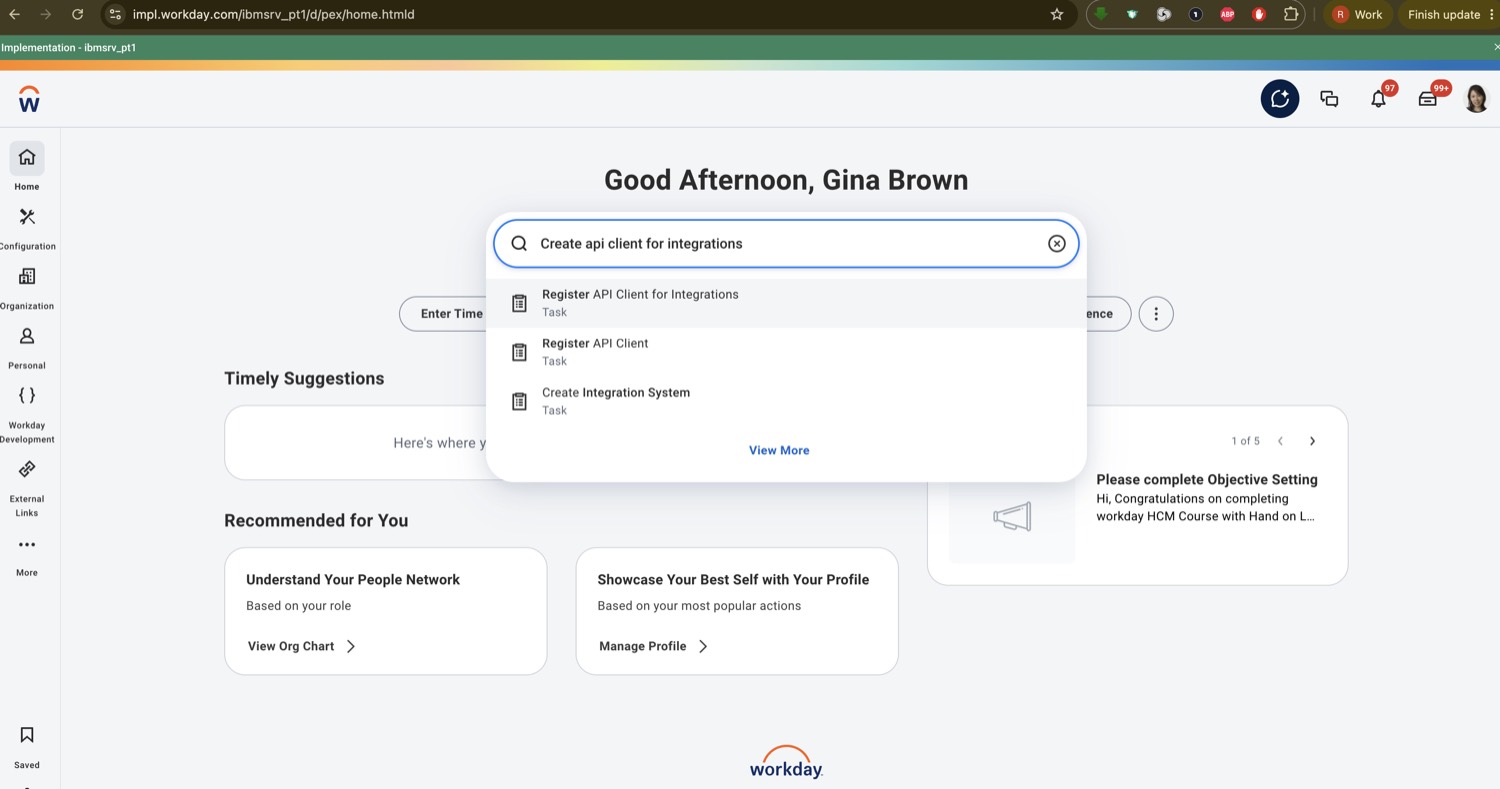
In the Workday search bar type Create API Client for Integrations and open the Register API Client for Integrations task.
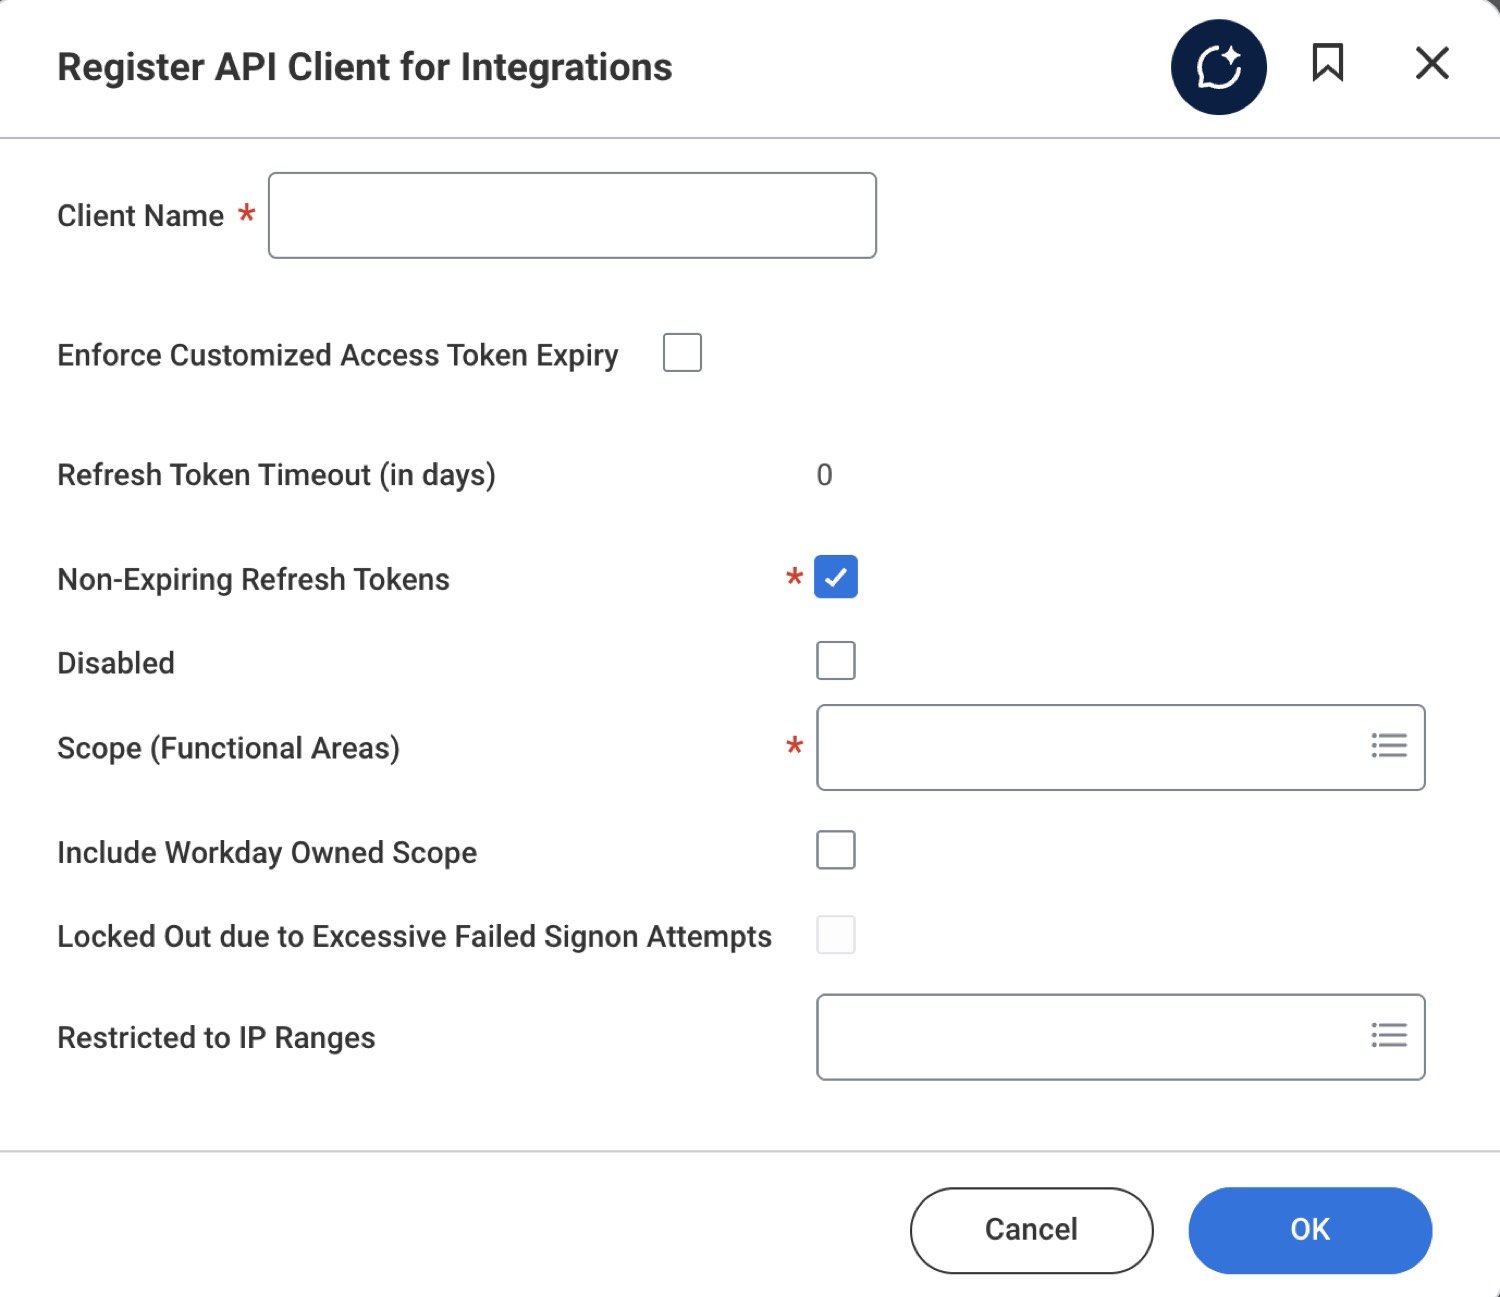
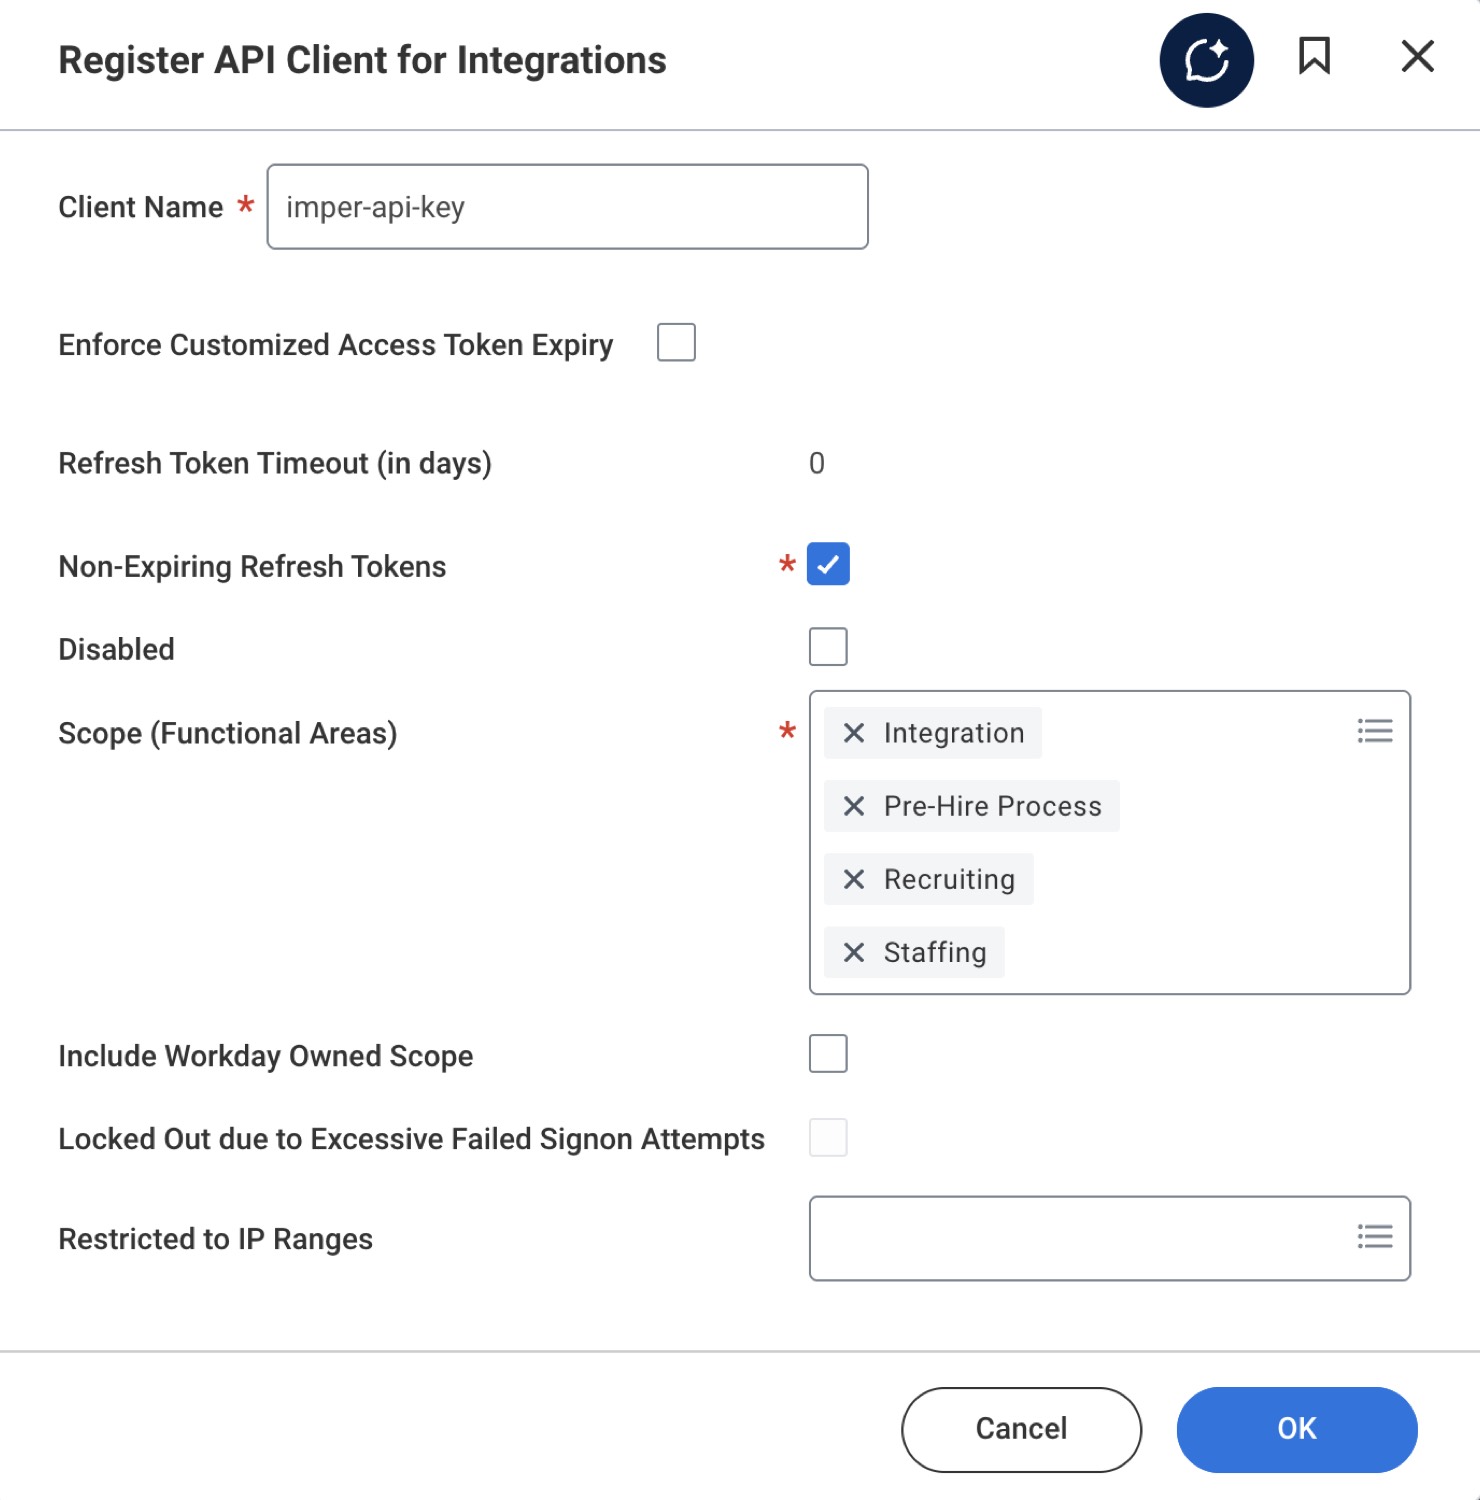
Set a Client Name, tick Non-Expiring Refresh Tokens, and set Scope (Functional Areas) to cover the domains you granted in the ISU guide - use Integration, Pre-Hire Process, Recruiting, and Staffing. Leave Restricted to IP Ranges empty unless you allowlist imper.ai's egress IPs.
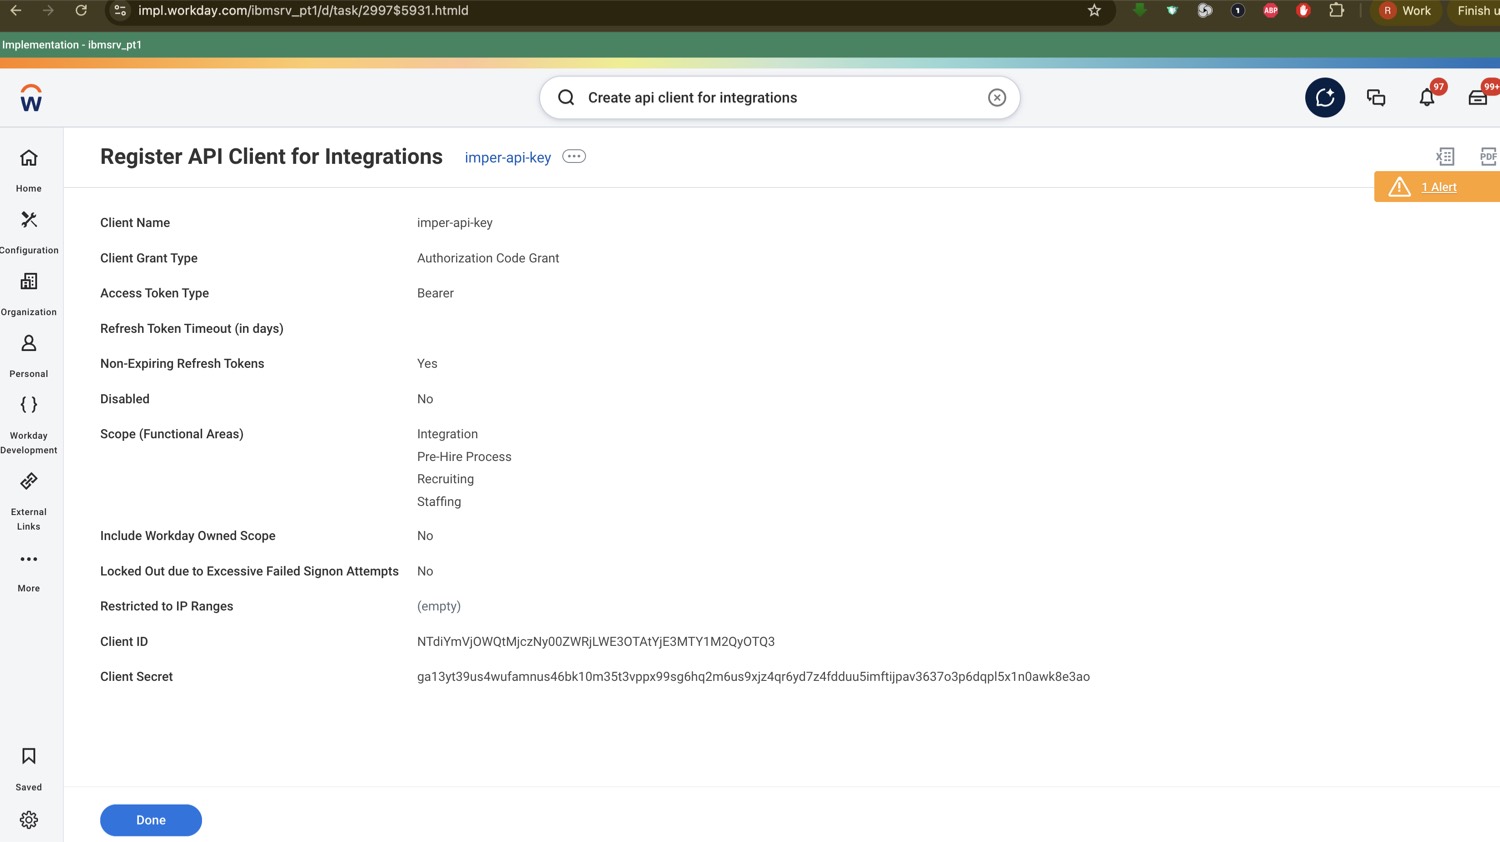
On OK, Workday shows the resulting client with its Client Grant Type = Authorization Code Grant, Access Token Type = Bearer, and the Client ID and Client Secret. Copy both now - the secret is not shown again.
IMPORTANT
Keep the secret safe. The Client Secret and refresh token are credentials. Store them in your secret manager and paste them straight into imper.ai - don't put them in tickets or chat.
Step 2 - Generate a refresh token
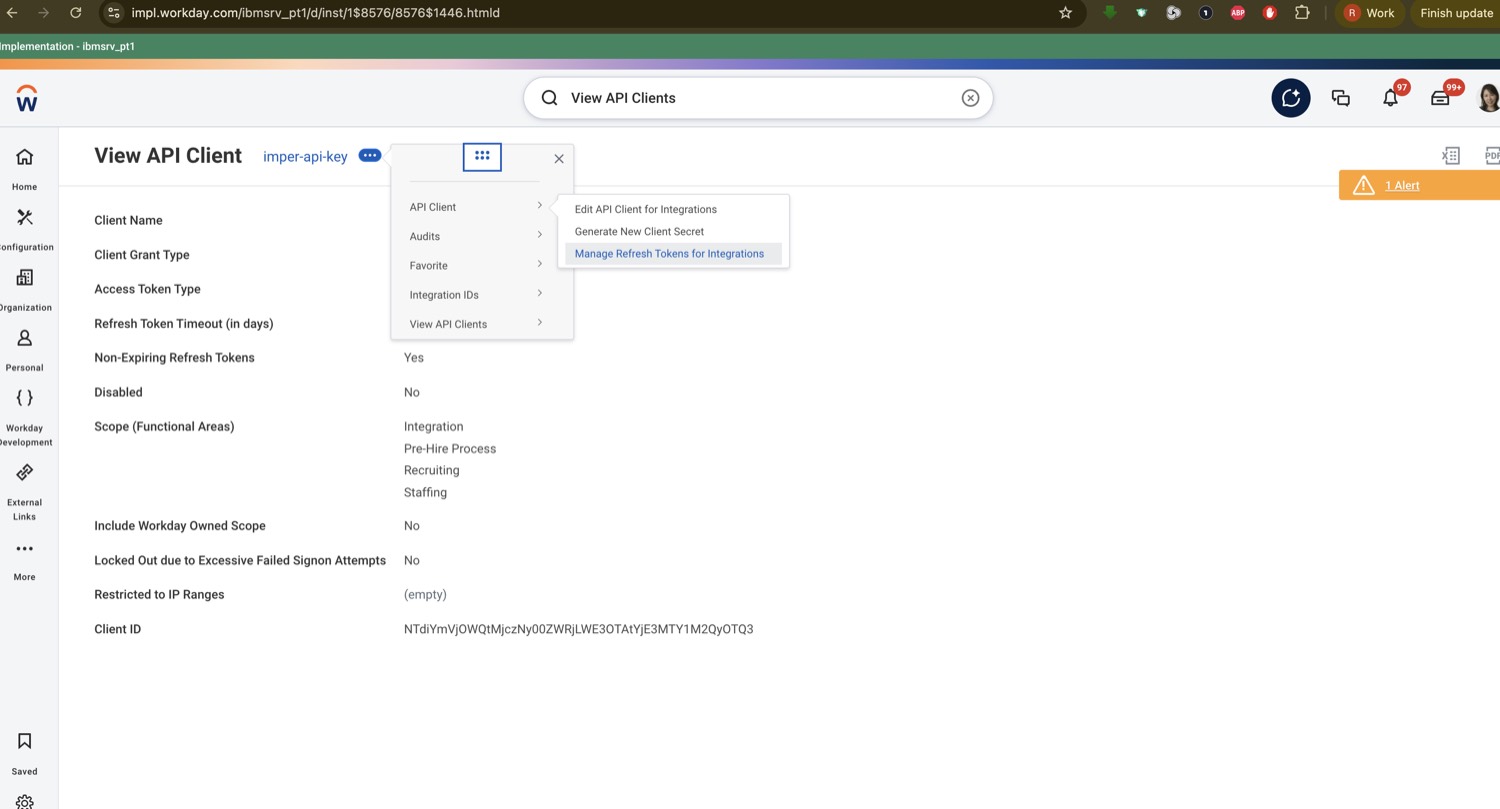
Open the client (search View API Clients → your client), click the ⋯ related-actions menu → API Client → Manage Refresh Tokens for Integrations.
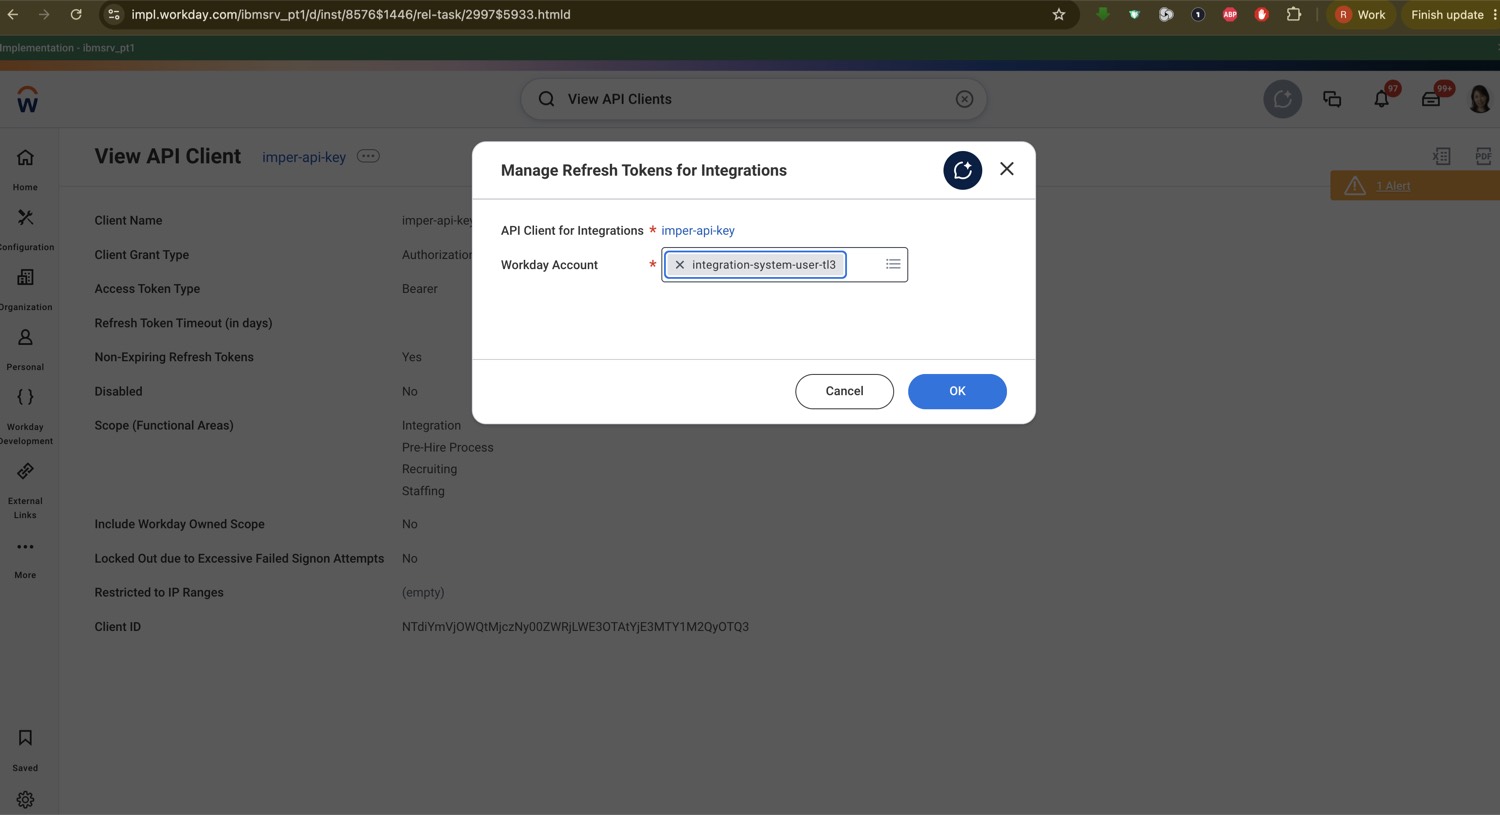
Select the Workday Account - the ISU you created in the ISU guide (for example integration-system-user-tl3) - and click OK.
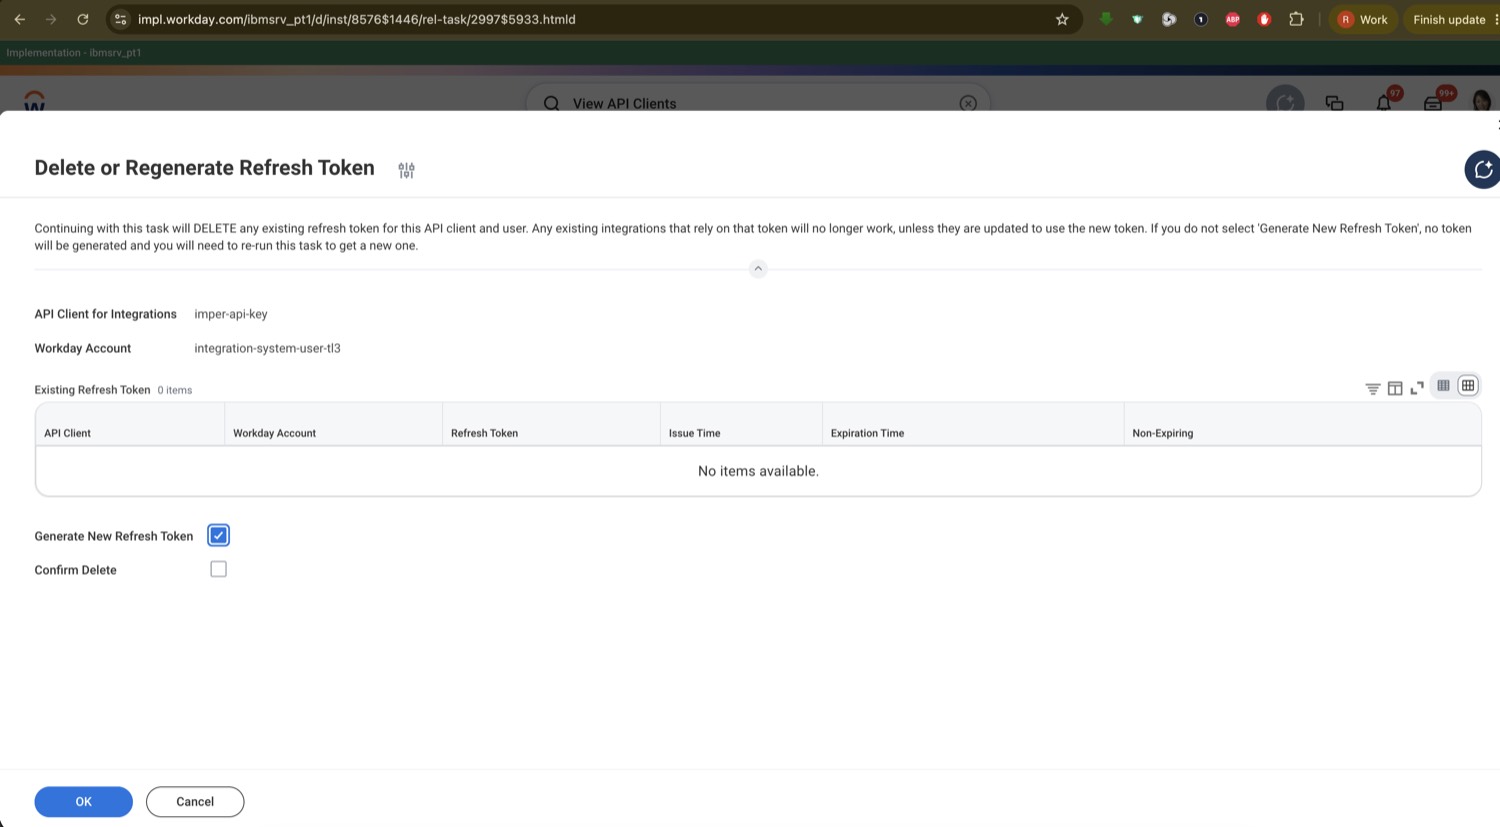
On the Delete or Regenerate Refresh Token page, tick Generate New Refresh Token and click OK.
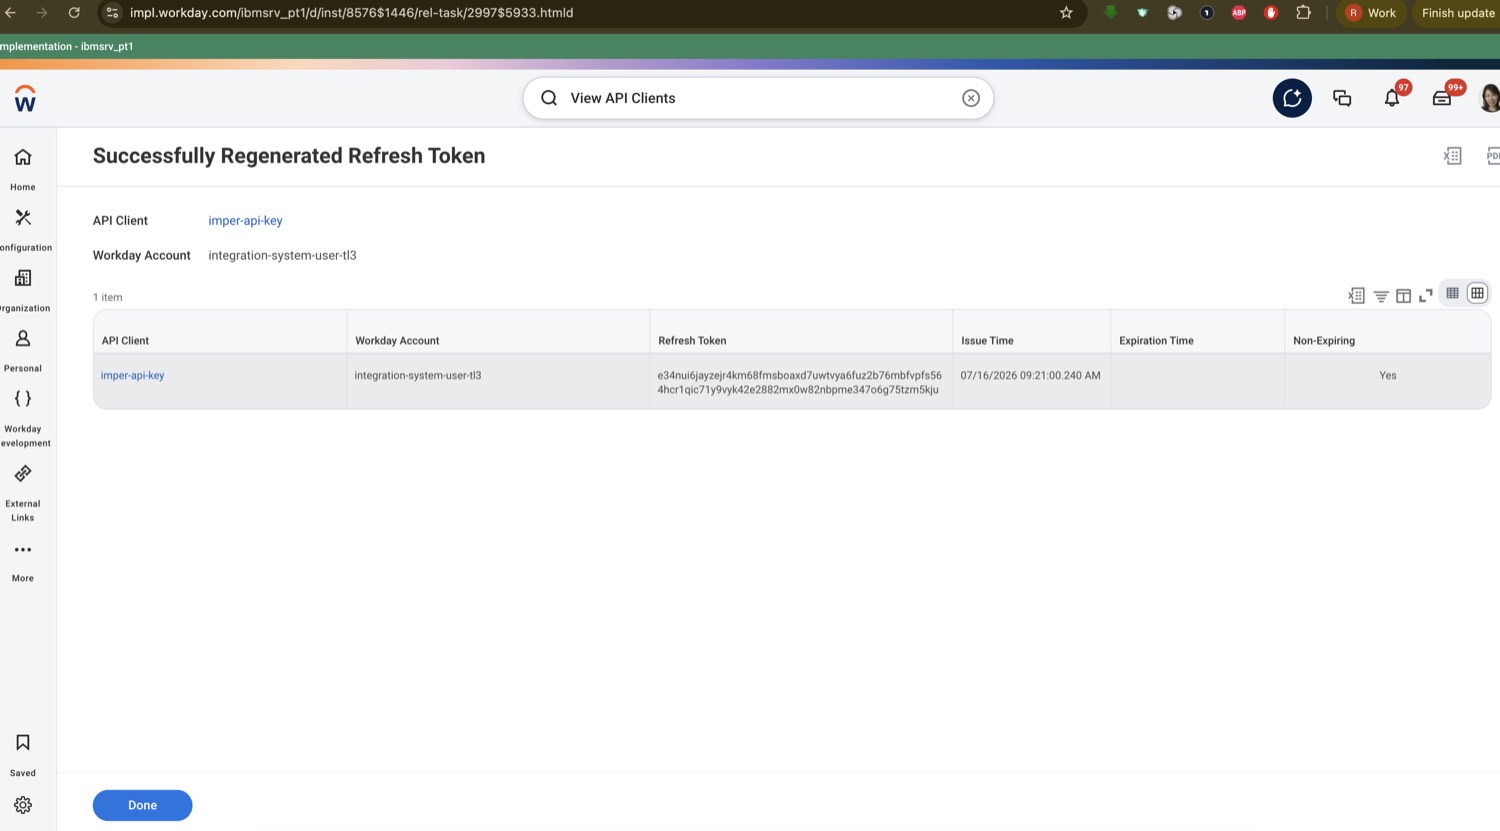
Successfully Regenerated Refresh Token then shows the token value, marked Non-Expiring = Yes. Copy it - like the secret, it's shown only once.
Next: connect in imper.ai
You now have the OAuth credentials. To finish, connect Workday in imper.ai using Step 6 of Create ISU for Workday Integration, entering the Client ID, Client Secret, Refresh Token, and WSDL URL.
Applies to Workday Recruiting (SOAP API v46.0). Task and menu labels can vary slightly by Workday release. Screenshots are from a Workday implementation tenant.