
Appearance
The Demo ATS page lets you try imper.ai for Hiring during a proof of value (POV) without connecting your applicant tracking system (ATS). You add test candidates and schedule interviews in the imper.ai console, and imper.ai runs the same identity verification your candidates would see in production.
The Demo ATS stands in for your ATS only for the POV. After the POV, imper.ai reads candidates and interviews from your own ATS automatically, and you no longer add them by hand.
Watch the Walkthrough
This video walks through the whole flow: adding a test candidate, scheduling an interview, what the candidate sees, and where to find the results.
The Demo ATS Page
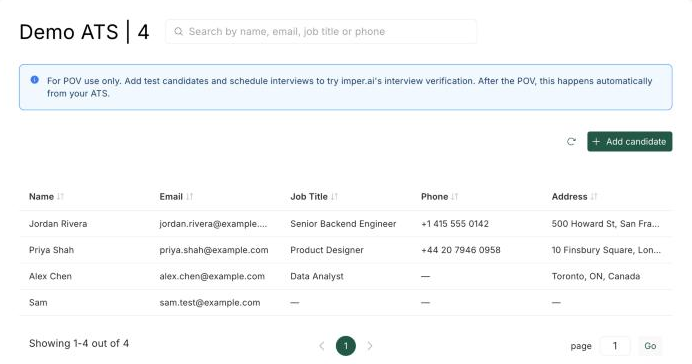
The Demo ATS page lists your test candidates. A notice at the top reminds you that the page is for the POV only.
How It Works
- Add a candidate. Enter a test candidate's name and email, and optionally their job title, phone, and address.
- Schedule an interview. Pick a date and time, and optionally add a hiring manager. imper.ai creates the interview meeting.
- The candidate verifies. The candidate receives an interview invitation by email. Before they join the meeting, they verify their identity with imper.ai.
- Review the results. The candidate appears on the Candidates page, with their verification results and Analysis Report.
NOTE
Use email addresses whose inboxes you can open, so you can go through the invitation and verification exactly as a candidate would.
Add a Candidate
- On the Demo ATS page, click Add candidate.
- Fill in the candidate's details, then click Add.
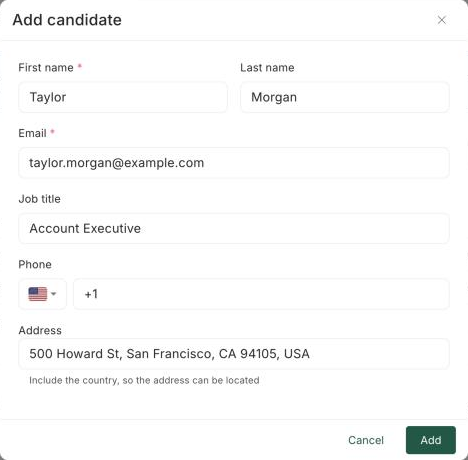
The candidate appears in the table. Use the search box to find a candidate by name, or email.
View a Candidate
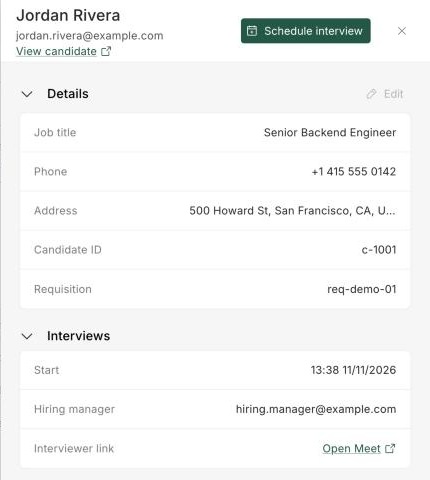
Click a candidate in the table to open their details on the right. The Details section shows all the information you entered for the candidate, along with their candidate ID and requisition.
From the panel you can:
- Edit the candidate's details - see Edit a Candidate's Details.
- Schedule interview - see Schedule an Interview.
- Review interviews - the Interviews section lists every interview scheduled for the candidate, latest first, with its start time, hiring manager, and an Open meeting link for the interviewer.
- View candidate - opens the candidate on the Candidates page. The link appears once the candidate has an interview.
Edit a Candidate's Details
Click Edit in the Details section to change the candidate's email, job title, phone, or address. The candidate's name can't be changed.
NOTE
A candidate's details are locked once they have an interview. To try different details, add a new candidate.
Schedule an Interview
- Open the candidate and click Schedule interview.
- Select the Date and Time. Choose Now to start the interview right away, or a later time in 15-minute steps. Times are in your browser's time zone.
- Optionally, enter a Hiring manager email. The hiring manager receives the direct meeting link, not wrapped by imper.ai, so they join the meeting without going through verification.
- Click Schedule.
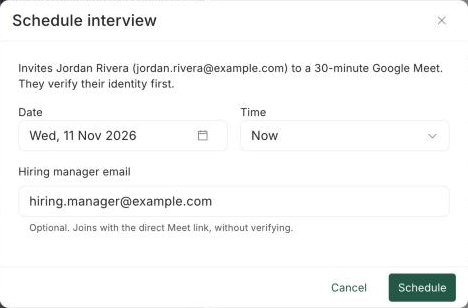
imper.ai creates a 30-minute interview meeting and emails the candidate their invitation. The interview appears in the candidate's Interviews section.
NOTE
For security:
- Candidates can enter the meeting no earlier than one hour before the interview starts. To test right away, schedule the interview to start within the next hour, or choose Now.
- The candidate goes through verification only once. After they pass, opening the link again takes them straight to the meeting.
The Candidate Experience
After you schedule an interview, the candidate goes through the same steps they would in a full deployment.
1. The Candidate Receives a Calendar Invitation
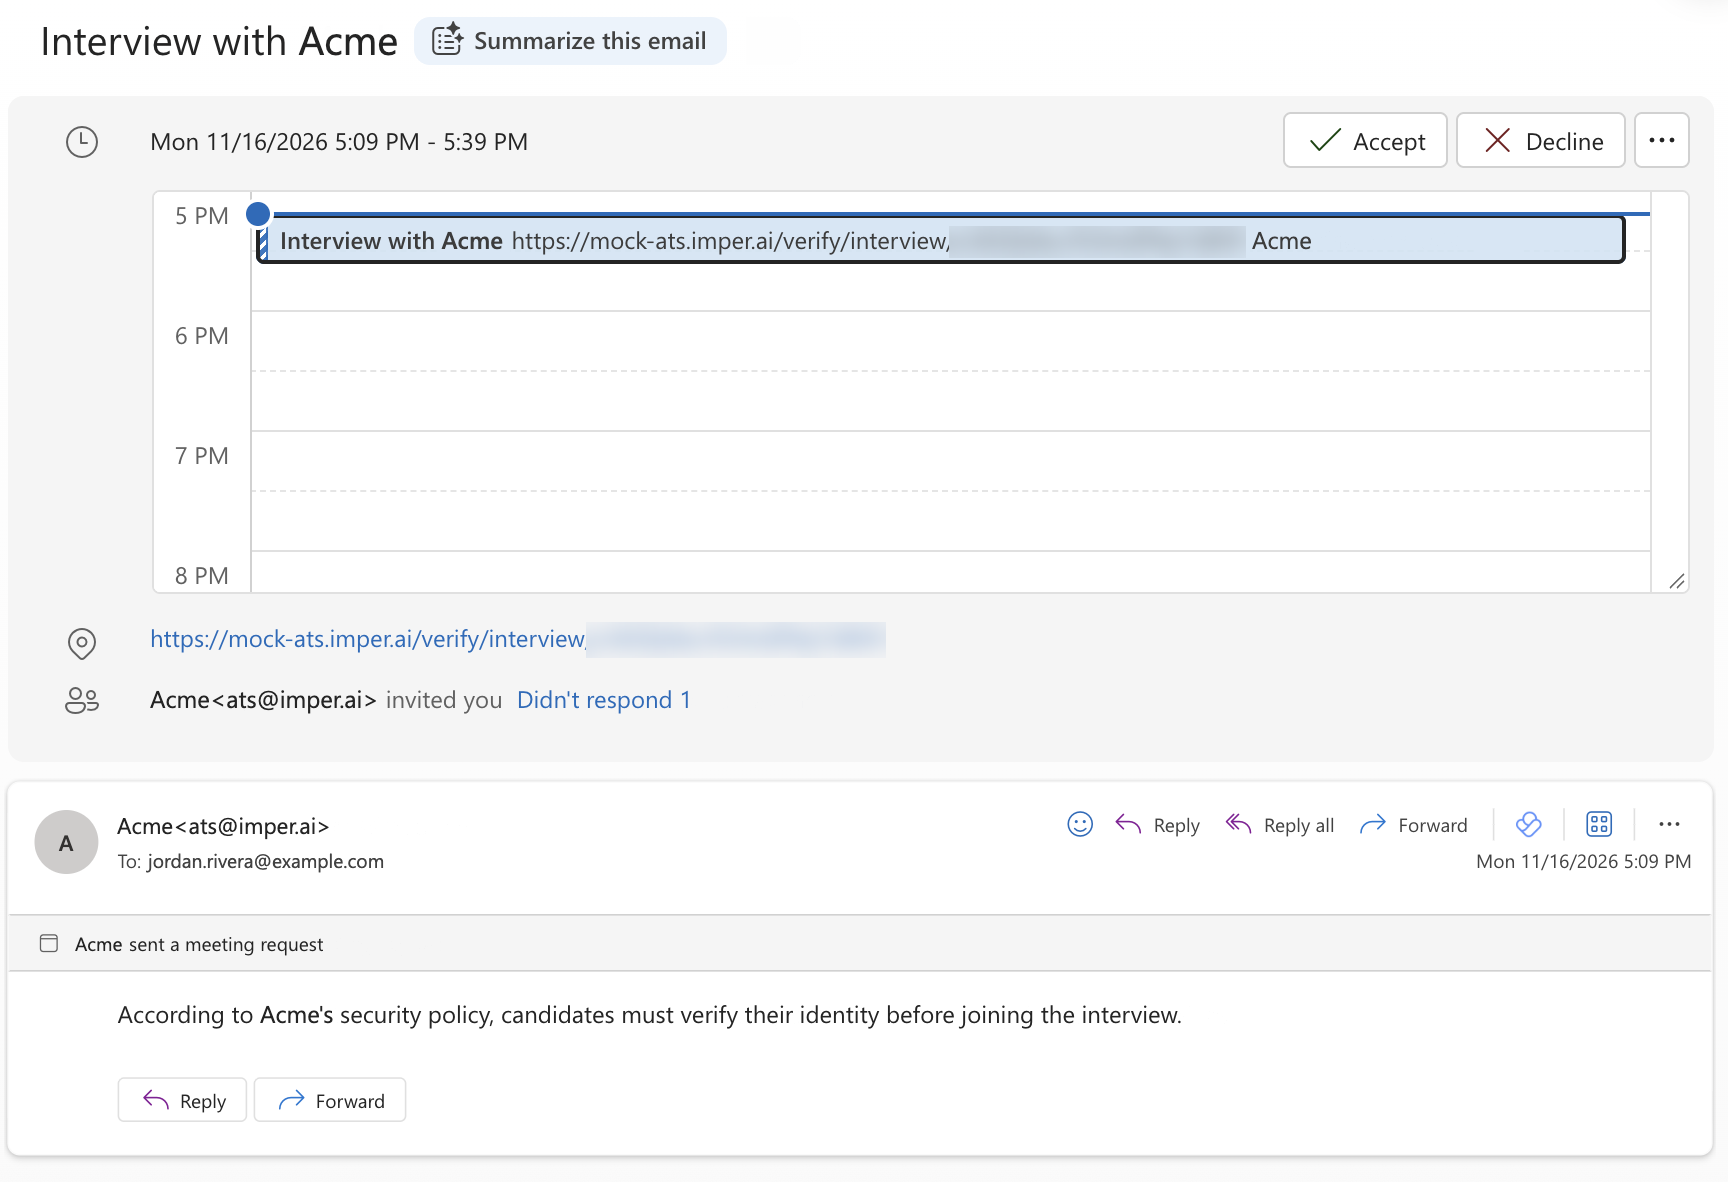
The candidate receives a calendar invitation for the interview. The meeting link in it is wrapped by imper.ai, so it opens the imper.ai verification page instead of the meeting itself.
NOTE
If the candidate's email address is in your own organization, as is common when testing, your organization's email filtering may hold the invitation for a while before it arrives. If it hasn't arrived, wait a few minutes and check the spam or junk folder.
2. The Candidate Confirms Their Identity
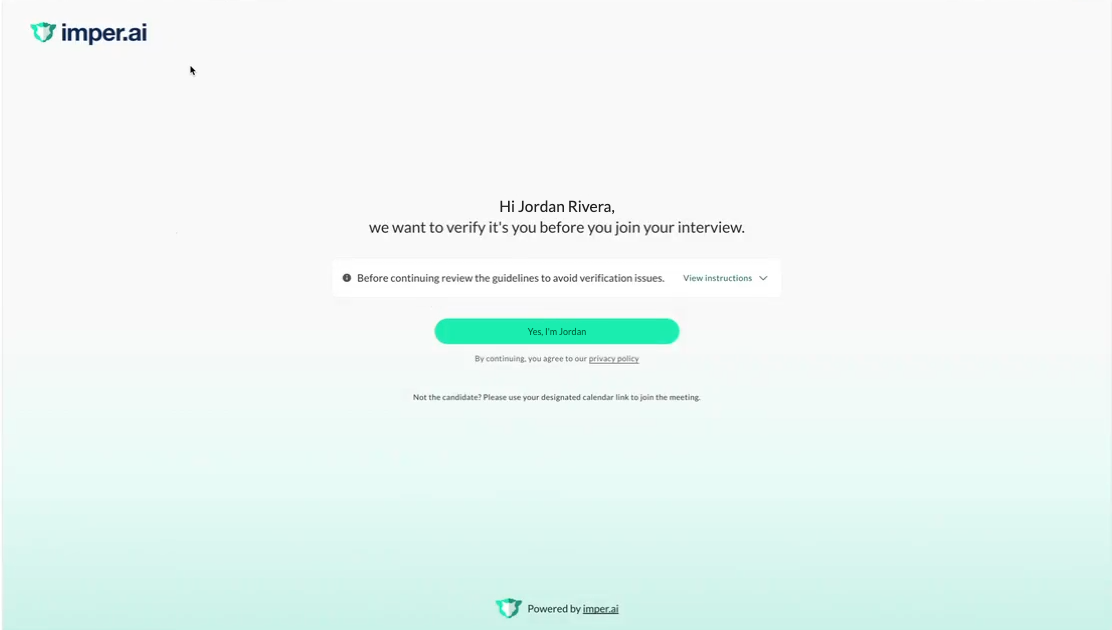
When the candidate opens the link, imper.ai greets them by name and asks them to confirm that they are the candidate before continuing to the interview.
3. imper.ai Verifies the Candidate
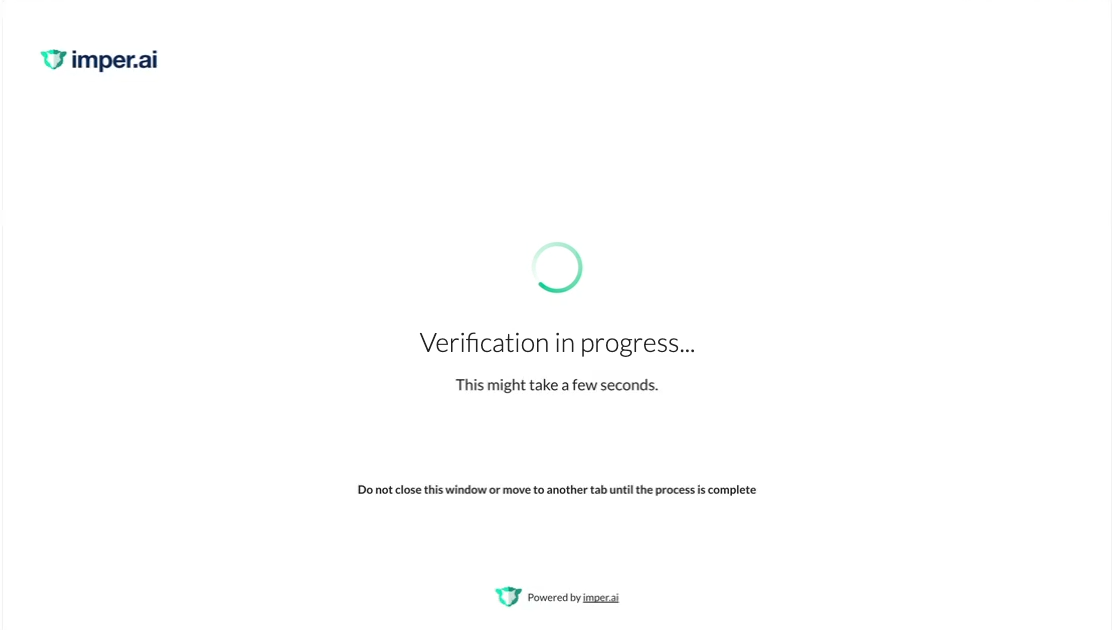
imper.ai runs its verification checks while the candidate waits. The candidate is asked to keep the window open until the checks complete.
4. The Candidate Joins the Interview
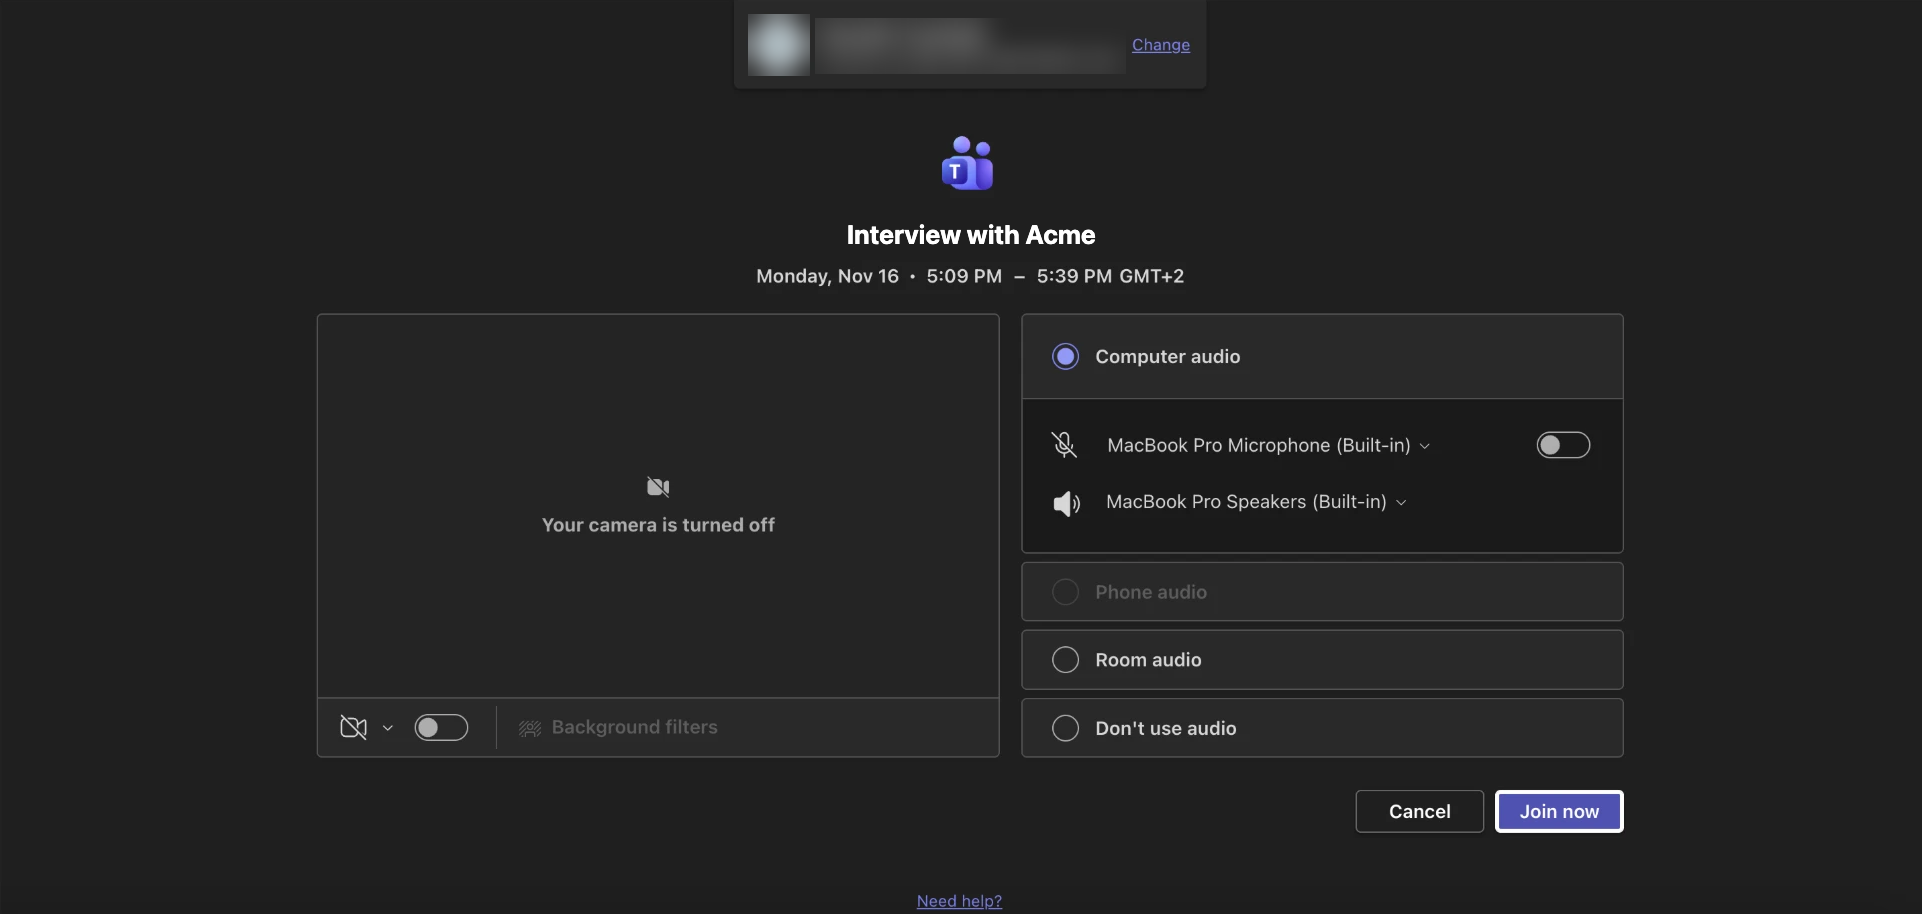
When verification completes, the candidate is redirected automatically to the interview meeting and joins as usual.
The candidate's results then appear on the Candidates page.
After the POV
When you move to a full deployment, you connect your own ATS, and imper.ai verifies candidates for every interview you schedule there - no manual entry needed. See Connect Your Systems for the supported recruiting platforms.